
The French left at the end of the 20:00 turn.
Note the Prussians are back in Wagnelee and Le Hameau.

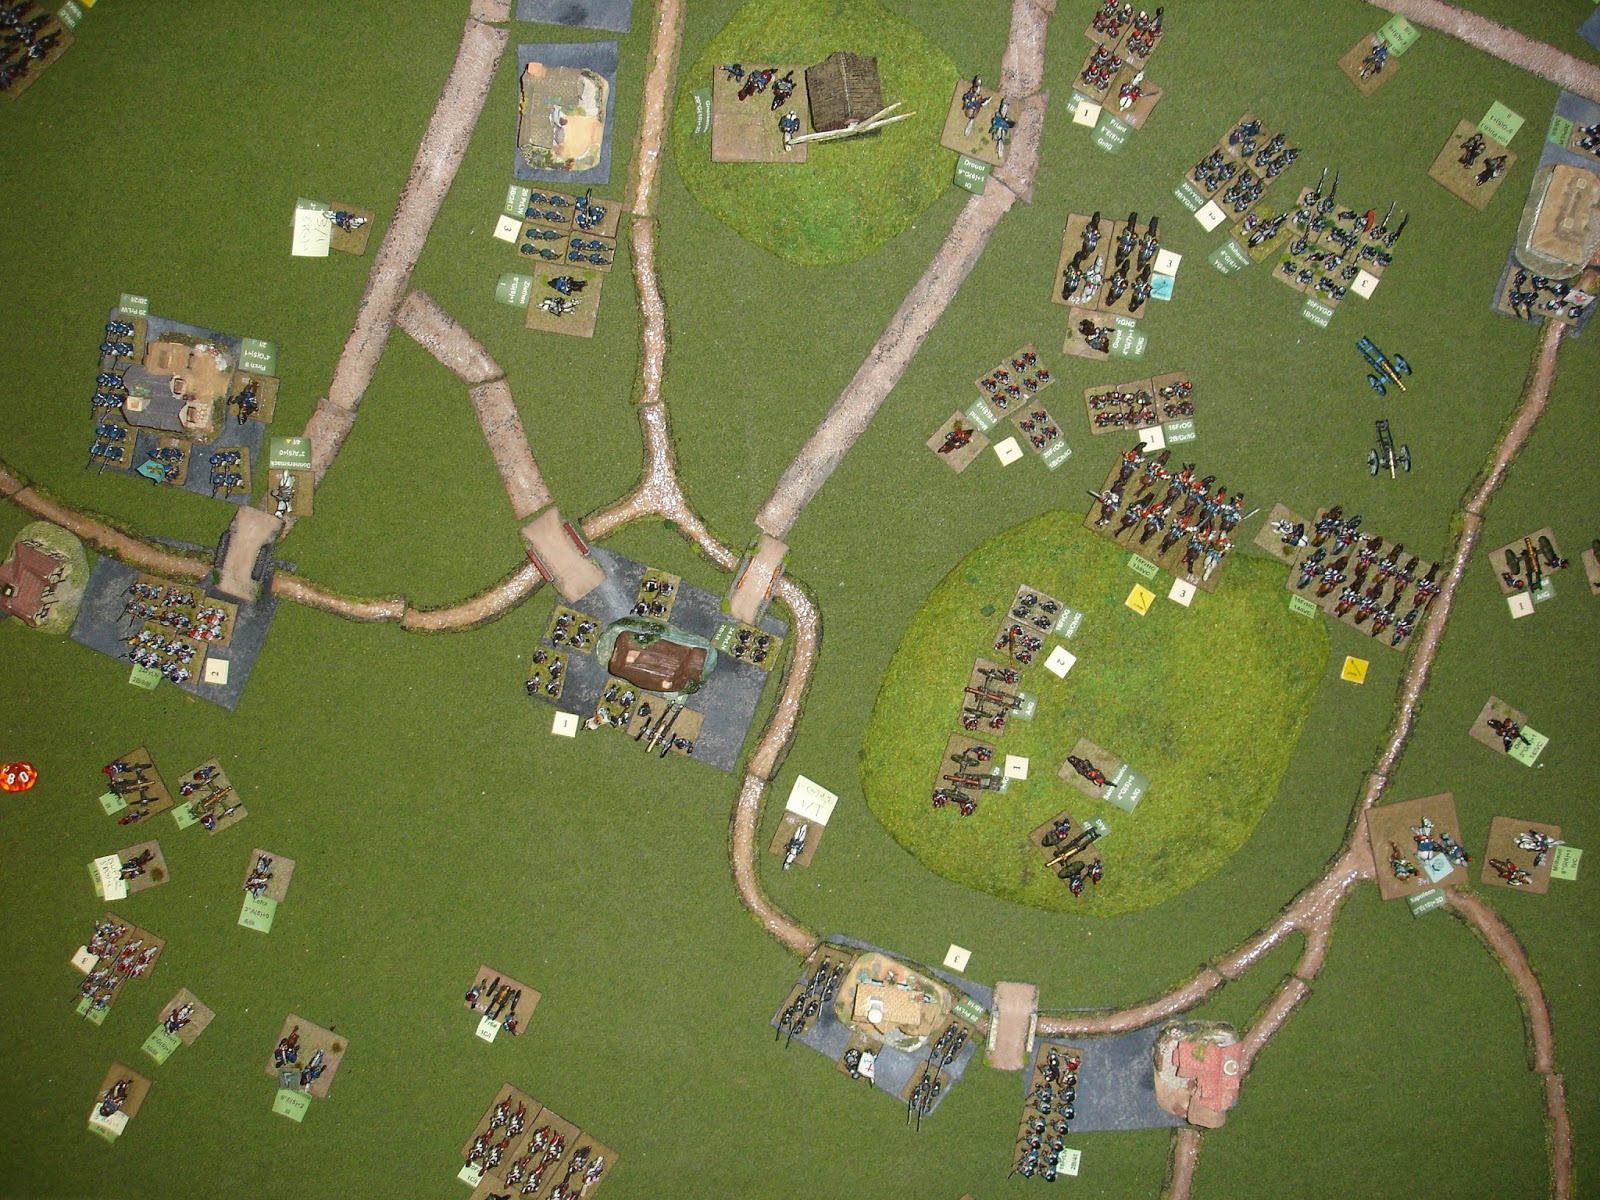
The French right.
Gerard's IV Corps is fatigued.
The 20:00 turn had seen a period of consolidation with the French firmly across the Ligny brook.
But then they struck west.
But then they struck west.

Vandamme leads the attack on Wagnelee and Le Hameau.

Morand cheers on his men as the Chasseurs a Pied of the Old Guard smash into the remaining Prussians of I Korps.

Even intervention by Prussian hussars couldn't stop the French Old Guard.
(It was a disaster as the disordered Prussian infantry was the modifying unit).

End of the 20:30 turn from the Prussian left hand side.
The Prussians hope to wear down the French in a long range fire fight.

And from the Prussian right.
Vandamme's III Corps is now fatigued, but he has taken Wagnelee and Le Hameau.
At this stage the French need to disperse about four Prussian units to break their morale. The French morale will fail if they lose one or two of the Old Guard infantry units.

The final assault.
The Young Guard and Guard Heavy cavalry are committed en masse,
with a bit of help from the Old Guard Grenadiers.
It's all over.
Milhaud's heavy cavalry are ready to put in a pursuit, but night is falling. Prussian morale has broken. Of the four French Old Guard units, one was 1 casualty away from dispersing (but Milhaud's cavalry could move to screen it). The French still had one Free Roll. The other Old Guard units were 5 and 6 casualties away from dispersing. They had wisely kept out of range of Prussian firing.

The French held Wagnelee and Le Hameau which had changed hands so many times.

The Prussians held St Amand le Haye.
The battery was way too powerful with it's all round fire for only a -1 penalty. I'm now of the opinion that built up areas are no place for the horse and heavy artillery batteries as depicted in Napoleon's Battles.

Half of St Amand is still in Prussian hands.
I was happy with the BUA rules (which is good as I'd put a bit of work into them). The challenge remains to get the footprint right and their terrain effects stated. This I maintain is more for the scenario than the rules themselves as villages and their surrounding terrain vary widely between battlefields I am sure.

Ligny itself.
The two forward segments had seen their occupants dispersed after a long day's fighting. The French, with just four small brigades in the IV Corps quickly ran out of troops in trying to combat this village.
I had left out the 9th Prussian brigade which was part of II Korps. From my reading it only came in late to help with the retreat.
The arrival of the French 4th Division didn't do much (one brigade was dispersed by fire from the western segment of St Amand and the other one held to other half of St Amand, but didn't launch any attacks).
The stream, representing one inch of rough terrain, caused delay, but was not a significant factor in combat (as in no units won or lost because of fighting in the stream, but plenty of units couldn't immediately get into action because of the stream). Artillery could only cross limbered at the BUAs, infantry had to be in column, but cavalry could cross regardless of formation (their formations tend to be deeper and their rough penalty movement factor is high, it generally took a full move for cavalry to cross).
The French tended to crowd together and this was impacted by their abundance of commanders. Adjusting the placement of generals after other movement had been completed, but before enemy recat phase, worked well, but I still think a general displacement rule is needed as they still caused blockages.
Optional rules from the 4th Edition that we used and I thought worked well were the self command and self rally. With those two rules I would be comfortable see commanders displaced being off the table for one move.
While I enjoy seeing the close-ups of your fine fine figures, the last overhead shot provides a good scope of the game. My favorite. Glad you spread such a massive game over several postings. Much easier to follow and absorb without becoming overwhelmed.
ReplyDeleteThis outing ought to count more than just one of your 6 x 6 Challenges, I think.
Excellent stuff!
Thank you.
DeleteThe camera I use, while old, is 7MP and seems to take just the right size photos for my blog. I often trim them by removing extraneous stuff on the edges, but I always hope there is plenty of detail to be seen if you click on the picture. With the miniatures and the labels I also hope that people can at least work out which side the various units are on.
It was really good to be able to play out this game at leisure.There was about 15 hours of play all up (quickly calculated off the top of my head).
I think the good Kaptain does count each post as a six by six entry so I am covered.
Thanks again. I am glad you enjoyed it.
I've been enjoying this series - enough that I'll go back over the whole thing. It's the level of action that I'd like to achieve in my own games.
ReplyDeleteThank you.
DeleteThe ebb and flow worked out well. It is a reason why I have always enjoyed Napoleon's Battles as you seem to be able to do stuff. Other Napoleonic rules I've played (and there are only a few) never seemed to be able to get the dynamic going. You moved forward in a prescribed manner, attacked and that was it.
The "cavalry react" mechanic in Napoleon's Battles is good and in playing this game, I got a better sense of the long and close range combat systems. I've been playing for close on 30 years and still learning (which is a good thing).
Cheers!
PS I've been looking at your Hexblitz game with interest.