Friday, June 29, 2018

How the French Won Waterloo

I bought this book at the top of the Arc de Triomphe.  Enough said.


I found it entertaining, but serious at the same time, as it is a statement of the way things are.  Of course hindsight generates a lot of excuses.  Napoleon was also a master propagandist and that has spilled over on to his followers (legendary, if potentially mythical,  Nicolas Chauvin for example).

My favourite bit was this prayer:

Notre Empereur qui êtes à Sainte-Hélène
Que votre nom soit respecte
Que votre règne revienne
Que votre volonté soit faite
Contre tous les ultras qui nous ôtent nos pensions
Débarrassez-nous des maudits Bourbons
Ainsi soit-il.

Regardless of the outcome of the battle, Napoleon certainly dominates the world stage.


Thursday, June 28, 2018

Battle of Sadras 1787

So it is not Napoleonic, not even revolutionary, well French revolution that is, but I am stuck with my Napoleonic Naval label.  In hindsight I should have gone with Age of Sail or something.  Never mind, on with the game.

 The British ships in line ahead have snuck between the French Ships of the Line and the transports they are meant to be guarding (off table, top edge).
The French are hurrying to rescue their transports.
The arrows denote the wind direction.

Details of the scenario for It's Warm Work designed by Darren.
The game used his models and he umpired.
Simon and Stephen B took the British 
while Dave and I went the French.

 My squadron, on the left, took early fire from the British due to accurate dice throwing by Stephen.
One page summary sheet is all you need.

 Dave's squadron worked around behind while I engaged the enemy in what was a rather one sided affair.  They shot first and threw multiple sixes.  The French captains, so far from home, were understandably nervous.
Six sided dice plus fire template visible in top right hand corner.

 One of my ships is wrecked and another boarded.
The white squares indicate French ships whose captains who have decided that 
discretion is the better part of valour.
Turning templates and China graph pencil are other tools in use.

 A close up of the excellent little models we were using.  
Old Glory 1/2000th IIRC.

Vengeance.  My ship rakes a British ship and wrecks it.
Also, we have passed round the British and can see our way to saving our transports.

 There is now a bit of distance between the two fleets 
as the British have had trouble turning into the wind.
Note disc for determining ship speed based on wind direction.

It's getting late so this was the final move.
The British had inflicted more damage.  
The French had lost two ships, the British one.

The game played really well.  Lots of laughs.

Sunday, June 24, 2018

Seven Pines - Confederates Go For The Win

Last played in October 2017, I brought it out for today's NWS Games Day in the hope of playing it with Craig.  Unfortunately he had to cancel and so Stephen took on the task of defending the Union.  I went Confederate rather than my usual job of umpire.

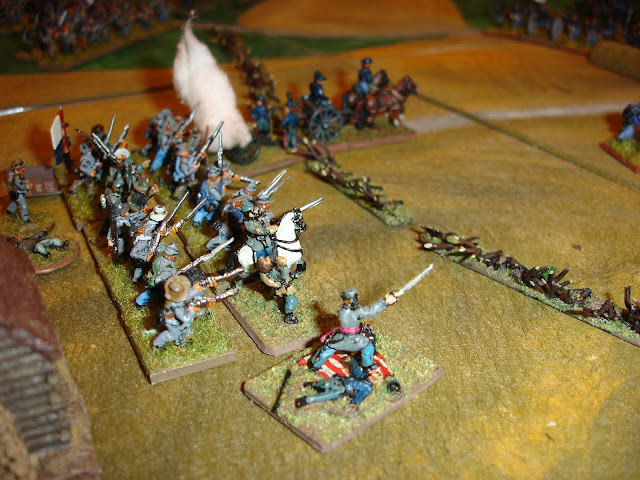
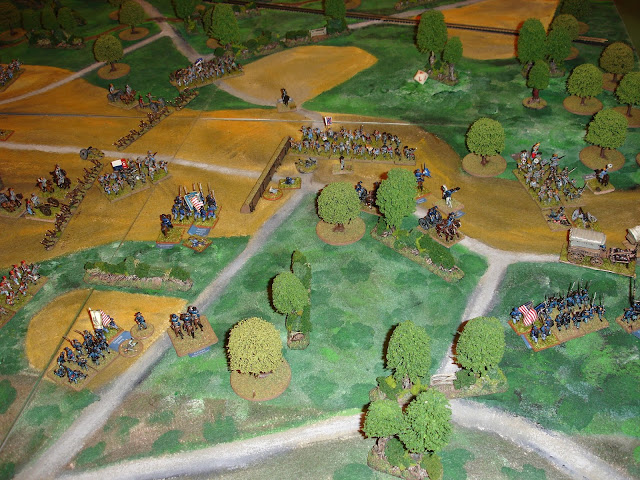
 DH Hill sends Garland's and Rode's brigades into an immediate attack.

Garland is repulsed.
Rode was also checked.

 But come 13:30 Garland has thrown back Naglee's brigade.
However Rode is still stalled.

 Garland follows up and totally breaks Naglee's brigade.

 By 14:00 Garland is well to the fore and Rode has finally got Palmer's brigade retreating.
GB Anderson's and Rain's brigades have arrived
 and are working round the left and right flanks respectively.

 End of 14:30 as seen from the Union positions.
DH Hill is letting Rode deal with the Twin House redoubt.
Garland, is moving into the woods to avoid the Union artillery fire
 and the other two brigades are moving up through the woods as well.

 Rode makes his first attempt to storm the Twin House redoubt.

 The second attempt, with support from Rain meets with great success!

 The Confederates have a breakthrough and finish the annihilation of Casey's Division.

 The end of 15:00 turn.  
The Confederate advance has been unrelenting.

 By 15:30 the Union right flank has come under attack by both GB Anderson and Garland.
The recently arrived Kemper's Brigade is advancing down the centre, 
but suffering casualties from the Union artillery fire.

 By the end of 16:00 both sides have received reinforcements.
For the Union they arrived just in time to halt the threat to their left flank,
but on their right the Confederates are in the supremacy,
even though Garland's brigade has broken.
Note broken Union brigades in the lower left hand corner.

 16:30 and the Confederates are able to attack all across the line.

 The Union centre holds, but their right has disintegrated.
The recent Union success on the left has also been checked.

 Crunch!
The Confederate left hook has destroyed the Union.

 The Confederates take the Cross Roads Redoubt.

 And the Williamsburg Road.

The recently arrived brigades of Heintzelman's Corp are left to cover the retreat.

Losses have been heavy and the Union are left with only two worn and two spent brigades, everything else having been destroyed.  The Confederates still had three fresh brigades, but the others were all worn or spent.

The Confederates had some good die rolls that turned decisive when paired with poor Union rolls.  However their experienced troops were superior to the Union's green troops and getting those field columns out on the flanks proved very successful.  I also applied the -1 factor on the Maneuver Table to the Union once the Twin House Redoubt was lost.  This might be too severe given they are already penalised for being Green.

I made a few mistakes, most notably being that I took a 10 as a leader casualty, rather than a needing a roll on the Leader Casualty Table.  I also kept missing that some brigades had exceptional leaders and probably need to make some additional markers.  The same happened when brigades went from fresh to worn to spent - my technique to manage that was through having each brigade start with two command stands and remove as they become worn and spent.

Rules used were Brigade Fire and Fury released last year (or was it the year before...)

Thursday, June 14, 2018

Malmaison

A ride on the Metro and then a bus journey: it was well worth the trouble to get to this museum.  The many layers of history, individuals making their mark and changes of style and taste means finding something that is "as it was" is not to be expected.  Instead the stories that a location tells becomes the attraction.

But with Malmaison restoration has returned the ground floor at least to close to how it was in the days of Napoleon and Josephine.

The stocktake in 1814 after Josephine died allowed the identification and subsequent recovery of much of the contents, even though it had been sold off.  Some was even retrieved from Soviet Russia in the 1930s

The overwhelming feeling was of peace and tranquility.

Modern gateway and ubiquitous security check.

The entry way had been styled as a military type tent.
Every home must have one!

The library with Napoleon's desk in the background. 
Feel the power!

Empress Josephine slept here

The music room.

Looking towards the music room,
from the room with all the portraits of the Sultans of Egypt.

Postcard of the cabinet room at Malmaison,
sent to the ANF HQ in York, WA.  

View of the chateau from the grounds.


Aigues-Mortes

Walled city from the 12th Century.  You can walk the ramparts which I found to be most satisfying. The south and east walls are clear and west wall not too encumbered.  The more critical north wall now has a car park in front and some tall plane trees.  This means the additional defensive structures have long gone.  This also applies to the wooden defensive structures that would have topped the city walls.

The tower is amazing.

The city was built as the French kingdom's first port on the Mediterranean and as such a few crusades left from here.  However it silted up in a hundred years and more critically became redundant when Provence and its port of Marseilles became part of France.  However it still served as a military base and sanctuary after that.

Looking north along the west wall to the Constance Tower.
There is a canal that runs past the west wall,
which if I understand correctly,
gave the port access to the sea.

The south wall

Looking west along the south wall

Looking north west towards the Constance Tower.

The east wall in the distance

South east corner tower

On the east wall there were lots of pock marks on the towers, 
as if they had been used for target practice.

Looking south along the east wall

The north wall. As the area at most risk of attack, 
there were other defence works here, 
but now covered by the car park and trees.

View north from the Constance Tower. 
There is another water feature I failed to capture in the picture, 
on the immediate left hand side

Another view from the Constance Tower, 
along the north wall looking east.

And that is the tour bus pulling into the pick up bay and the start of my mad dash back. 
Luckily I met no one coming up the spiral staircase during my descent, 
or at least I don't think I did.

Wings of Holes

O

Shot To Pieces

Back from four weeks holiday in France (it was fantastic, some related posts will hopefully eventuate) and first night back at the club, what do I find, my camera battery was flat.  No problem, I had a spare.  That was flat.  Switch to phone.  It takes two photos and then gives up (I'm due a new one).  That leaves me with the iPad.  It takes blurry photos which Mark B detects as not blurry but smeery.  He finds a lens cleaner and we are back in business.  All well and good except for some reason the photos seem to be upside down.  Merde !

I feel compelled to take the French side and command two Nieuport NL28s.

The key thing to note is they can take 14 points of damage.

My opponents are Mark B in the two seater and Stephen in the yellow bird.

I thought being in control of two planes would mean they are well coordinated, 
which is a bit of a cheat really.

But I started taking immediate damage (and had my guns jam).

Things are hotting up.

And cooling down...

And really hotting up.
Luckily my planes had gained a few metres of altitude in their Immelmann turns
 and so avoided a very nasty potential collision.

Remember, the damage my planes can take is 14.

More dog fighting.

Looping the loop etc.
One of my planes is now smoking.

Diving and heading for home.

My planes were on 12 and 13 points of damage.
The German two seater was on 15 (it could take 16).
Stephen got away with just a cowardly 6 points of damage.

I have my regular photographic device (and its spare battery) on charge, so hopefully normal viewing will return.