Friday, November 29, 2019

World in Flames 18

Two more impulses completed of the May/June 1941 turn.  The Axis were blessed with good weather, but a number of poor combat rolls.


Down south the Soviets have lost Kiev and Odessa, but have formed a defensive line behind the Dnieper.  In the north Minsk has been lost and units including a HQ trapped in the swamp, but the Commonwealth have secured the Murmansk area which frees Soviet forces to try and create a defense of the remaining cities.  It looks a bit sparse...  It is hard to tell from the picture, but a number of Axis units and HQs are flipped.


China is doing okay after a failed Japanese attack.  However I feel I handled the USSR Far East badly and have now lost Mongolia, at least the Japanese are now looking over their shoulder at the waking giant...


Monday, November 25, 2019

First and Last Byzantine Skuotai

One (and the emphasis is on one) of the first metal figures I ever painted was this chap, Minifigs PB150, Byzantine infantryman.  Not sure I knew what Byzantine meant back then (mid 70s).

His spear was broke so I made a replacement from a paperclip.
I also cut him off his base as part of my "flat basing" strategy.
But one was all I did and I think all they had for sale in the Pultney Street model shop in Adelaide. 
 I recall the figures were all loose and jumbled in a big barrel.  
No wonder the spear was broken.

 But now I have my sixth legion of Byzantine infantry.
And to mark the occasion I used the same shield pattern.

 Front and rear rank all ready for Impetus.

 Now a days my figures are blessed with much more interesting bases,
and no longer cutoff, but built up with plaster.
All that remains is to add some flags.

Friday, November 22, 2019

Operation Ochsenkopf in 6 inches

After playing this scenario with Simon on Saturday, I was able to play it again with Richard on Thursday.  However I had made a big effort and drew up a 6 inch hex mat.  The previous game had been on my commercial 4 inch hex mat which had proved a tad squishy.

The first of many German attacks on one of the urban areas (C10)
and objective points.

The panzer grenadiers of Kampfgruppe Lang make an attack hoping to clear a way to Beja.

Another attack is made toward Beja, but the British have dug in.

The Germans are having a tough time fighting for the urban area (C10).
It really has become a battle of attrition.

However it is captured and the German infantry press on.

Back towards Beja and the Germans are trying to outflank the British defences.

British counterattacks go in against the urban area (C10).

The Churchills come out to play.

The last desperate counterattack to try and retake the urban area and the critical objective (C10).

The game plays much better on the 6 inch hexes, I just need to redo some of the terrain pieces.

The tactics needed for this scenario still aren't clear to me; a few more plays are required. 

This was Richard's first game of Rommel and he picked it up quickly and seemed to enjoy it.

Thursday, November 21, 2019

Alexander 400 versus Classical Indian

Going back to 400 points, my Alexandrian Imperials had a tough fight  against Dave's Classical Indians.

 The "Heavy" command with CinC is on the right,
the "Light" command is on the left.
I got to deploy second and so lined up my pikes against the elephants.

The Dice Gods didn't think much of my deployment
and straight away my CinC was downgraded.
Bummer!

 Not wanting to waste time under the shadow of the longbow,
my army makes a double move.

On the left I have some success.

But things get better when the enemy CinC is downgraded.

 Turn Two and contact.
My pikes were less than successful.
They could do better :-)
On the left the Indian heavy foot ran over two of my Thracian light foot.

The left wing command is left wondering where his troops went.
And whether his command is now really broken OOPS!

The pikes grind on.

The Dice Gods change their minds about my CinC,
but it is too late,
the reputational damage has been done.

 Turn Three and my left wing is about to collapse.
Maybe it already should have...

But the enemy elephants are in a sorry state.

 Turn Four and my left has shattered.
I just need to take out one more enemy unit on the right to break that command.

Victory!

My elite cavalry took four goes to inflict a single killing casualty on the unit they had been facing.  The number of dice rolled were 9, 6, 6 and 6.  Only on the final roll did a six come up.  Thankfully my other troops had fought better.

Dave had five tactical cards, I had four.  All were used to good effect.

Great game, but it might have been a victory for the Indians depending on how we use the 33% versus 50% break levels.

Wednesday, November 20, 2019

World in Flames 17

The May/June 1941 turn continues.

 End of the first Allied Impulse.
Units are being sacrificed to slow the Axis advance.

 End of the second Allied impulse.
The delaying tactic has allowed a defensive position to be established in the south.
The north is a bit open, 
but the Commonwealth have arrived and that will free up some USSR troops from the Finnish border.

End of the second Allied impulse on the Pacific map.
The fighting is now on Mongolia 
where the USSR made a counterattack against over eager Japanese mech units.
China has been bombed and shelled and the Japanese are just about to launch another attack.

We now enter the period of hoping for bad weather and a short term.

Monday, November 18, 2019

Operation Ochsenkopf

Another great scenario from https://www.hexesandminiatures.com/ww2-squares-rommel that Simon and I played out on Saturday at the club.  I had converted the map to hexes, but got the orientation of the hex rows wrong.  Doesn't matter in the scheme of things, just caused a little puzzlement at start.  The main thing was to have a fun game (achieved) and test out Rommel with hexes (perfect).  Only thing as you will see, my hexes are a tad too small...

 New purpose built hills (a delight using a hot wire to cut polystyrene).

 Deployment.  My hex mat provides a much bigger playing area than just 8x12.
But we just kept to the basics.

 The problem with small hexes!
Pity.

 Kampfgruppe Lang had a hard time making an impression on the British defending Beja.

It was probably wasted attacking there and if I had given the objectives a bit of thought I might have opted for a bit of "road movement" to redeploy.  Even though the Rommel rules are straightforward there are still a few things we have not yet mastered - capabilities that we can turn into tactics (rather than trying to work out the rule or anything like that).

 The fighting shifted to the other two frontline objectives 
where the 754th and 755th Infantry regiments 
were battling the British 128th and 138th Brigades.

 Eventually Kampfgruppe Lang switched its focus to the centre objective,
Tiger vs Churchill.
(first time these models have been used in action by me)

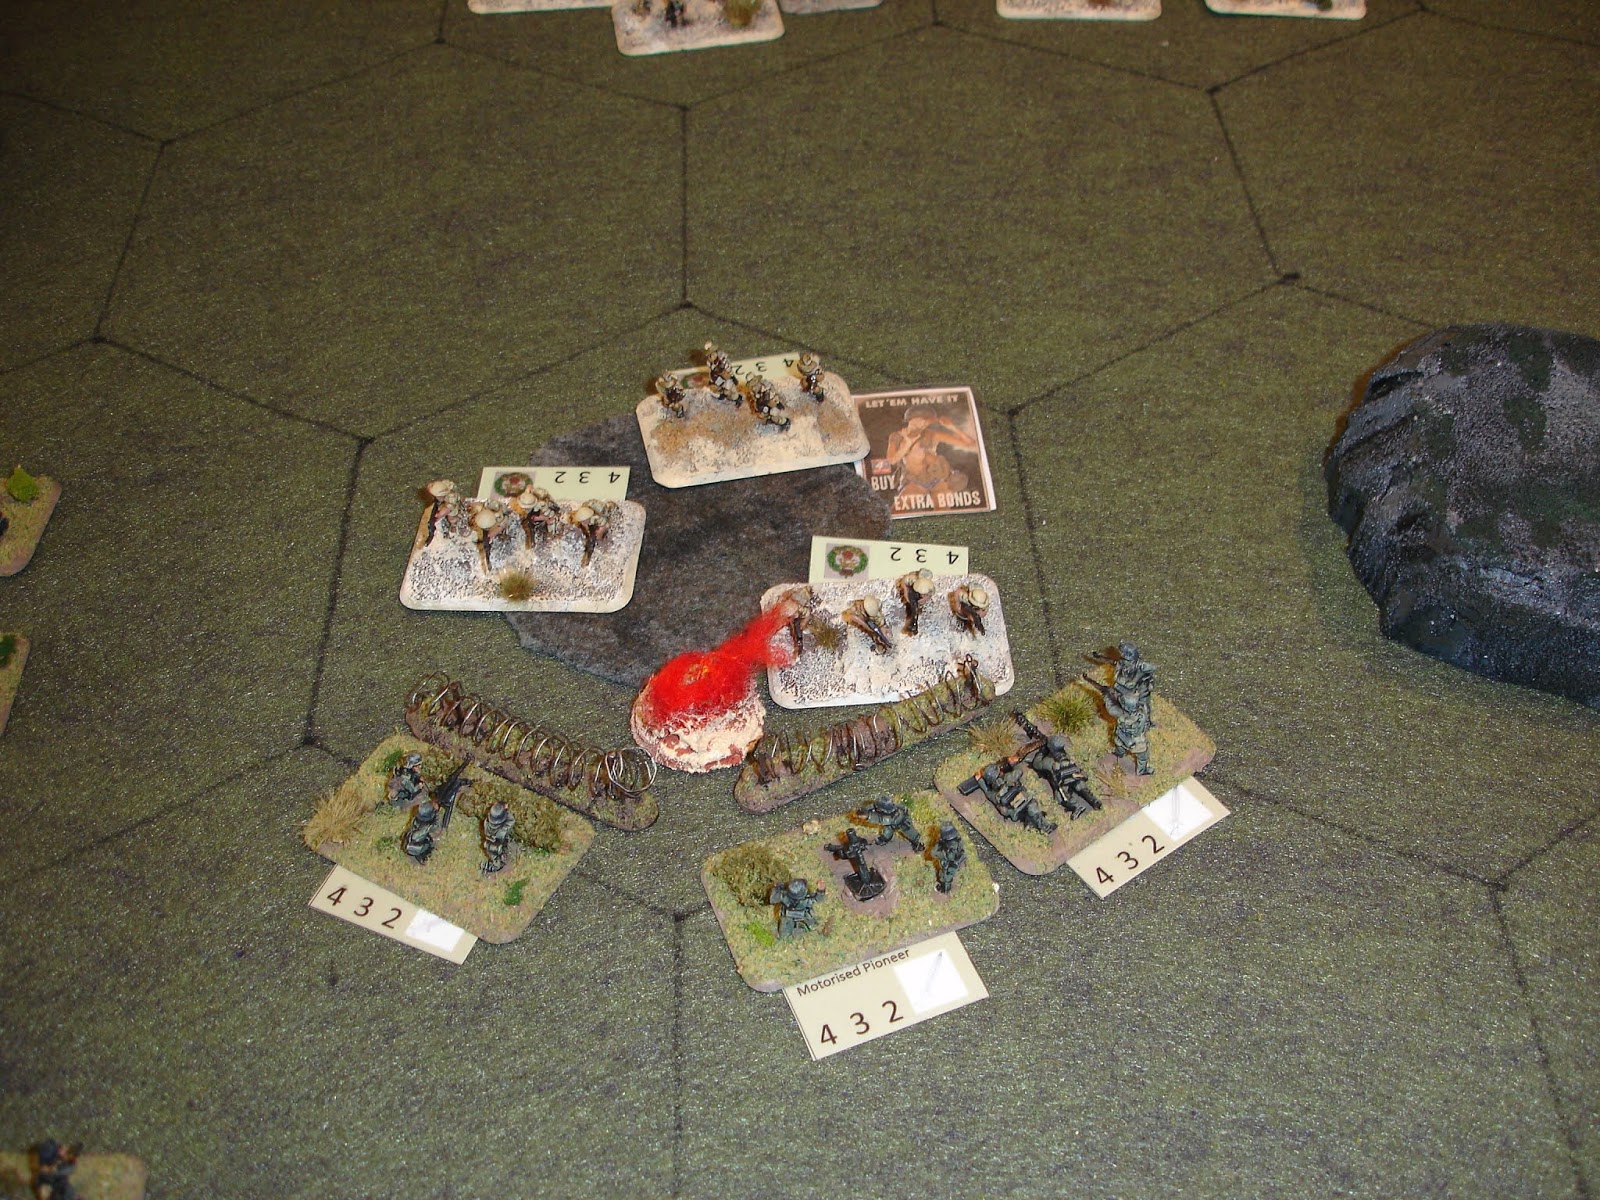
 Black markers indicated spent units ("tipped"in Rommel jargon).
The red markers are a recent addition to indicate attacks and 
essential in the confined spaces of this game due to the small hexes.

The low point of the Axis attack.
However the British had an equivalent roll near the end of the game
 that robbed them of a chance at success.

 So close!
The two defenders are down to their last strength points.
The grey area represents an urban area. 
The club building sadly had to be removed to facilitate play.

 Again, so close to taking the objective.
The defenders are down to one step,
if only there were ops dice to make another attack before they can reinforce...

A draw.

Both sides took a lot of punishment with about two thirds of the units being significantly reduced in combat power.  No objectives changed hands.

Great scenario as there was lots of thinking involved as how to best attack etc.

Apart from my hexes being too small, hexes are a good way to play Rommel.  The adaption was trivial and I think made a better game.

Saturday, November 16, 2019

World in Flames 16

March/April 1941 gave the USSR an extra impulse to finish its defensive preparations in the west.  Unfortunately the Axis now have the initiative in the plus 2 box.

Builds for the Chinese were a cavalry corps (Com) and a garrison corps (Nat) (4BP - which were 2 plus 2 from cadres).  For the USSR a HQ, two motorised corps and a mech division (16BP)

Not perfect, but it is basically what I had planned.
Would my plan survive the first impulse of battle?

I had flipped about with my eastern defensive strategy.
This meant it was only half baked, 
but I wrongly thought the Japanese were also unprepared ...

Defeat in the east.
With the loss of Vladivostok I can at least sue for peace and put this debacle behind me.

In the west my plan half worked.
I was surprised by a naval landing and a paradrop along with the Finns attacking Leningrad.
The Finns lost (phew!), the naval landing in Estonia will just hurry up the retreat from the Baltic.
The paradrop is more interesting...


Thursday, November 14, 2019

Another narrow aerial escape

 I take back to the air in this cute little Nieuport.

 Two huns are engaged.

 I almost have a victory when the enemy suffer a near miss aerial collision.

 But my crate was badly damaged in this dog fight.
With all that engine damage I was lucky to get away.

 The only shot of mine that found it's target.

The other enemy plane got off Scot free.