Thursday, March 31, 2016

The Flight of the Straaken

Last night we took some of Stephen's Wings of Glory planes for a flight and fight.  He commanded the Zeppelin Straaken and I tried to intercept with a Camel and two Snipes.

First up my Camel crashes into the monster.

And then one of the Snipes is shot down.  Note Camel now diving underneath the German bomber.

The second Snipe is taking a while to get into action.

I get on the monster's tail, in the sweet spot and my guns jam...

The Straaken weaves and we're back in shooting angle...

Another pass.  I seem to have my act together.

Nope.

The other Snipe is shot down and with the Germans now heading for home the Camel, with a wounded pilot, decides to break-off.  The Straaken had suffered about two thirds damage.

Tuesday, March 29, 2016

Taking Lead Mountain, a pikeman at a time.

At least some of these figures have only been on the to do list for a few years and more strikingly I got them all done in ten days which would be a record for me.  I attribute this speed to my first use of a wet palette.

The figures are 15mm Tin Soldier  HB14a - SELEUCID/BACTRIAN PIKEMAN, a one piece casting full of character and will do for any of my Hellenistic pike armies.


For my future reference the paints I used were:

Undercoat - Tamiya Red Brown XF64 (and this also served for the foot wear)
Linen Cuirass - VJ Stone Grey 70884
Uniform base - Jo Sonya Brown Madder
Uniform highlight - JS Napthol Crimson
Flesh - VJ Medium Flesh 70860
Base Pike fixtures - JS Carbon Black (I missed this step but the VJ Oily Steel metal colour didn't look good with a brown base, so I redid them to make a black base)
Beards - JS Carbon Black
Pike fixtures - VJ Oily Steel 70865
Flesh wash - Citadel Shade Reikland Fleshshade
Pike shaft - VJ Dark Sand 70847
Helmet - JS Rich Gold
Leather - JS Indian Red Oxide
Shield base - mix JS Rich Gold and JS Burnt Umber
Shield design - JS Burnt Umber
Shield highlight - JS Rich Gold
Pants - various Jo Sonya colours that dulled down using the brown base miraculously giving the effect I was looking for

DBA Late Visigoths tackle the Sassanids

The Visigoths just didn't realise how late they were.

Easter Monday and I scratched up, using my rarely played generic Dark Ages figures, a Late Visigoth army to take on Mark B's Sassanids.  In this picture and the last one I've doctored them to remove the edge of the board.  

Despite appalling PIP rolls (1,2,1,1) I felt confident as my army was together as one group while the Sassanids appeared a bit spread out.

Fourth turn and my poor rolling continued and with four elements lost that was it.

What I like about DBA is that it is quick, mercifully in this case. 

The only die roll I won was on my right were my PS pushed back his CV.  Everything else was ties or outright defeats.  And things started so well when I won the aggression roll...

Wednesday, March 23, 2016

Clash of Vikings and Pagan Rus

Tonight had a friendly game of Saga.

The scenario was Clash of Warlords.

My warriors took possession of the terrain, but movement was slowed due to endless winter.

Shooting range was also reduced so my levy did precious little.

Finally my warriors got into action.

But the enemy counter attacked.

Not only were the warriors wiped out but the unit of hearth guard I then sent in got annihilated as well.  It just so happened that everyone was close enough to be fatigue by this.  Luckily  the scenario only goes for six turns.

I am still finding Saga a challenge, but in a good way.  One thing I am not sure of is whether a unit fights with all its figures if in a melee it is just attacked at one end. 

Monday, March 21, 2016

Early Macedonian Successor vs Carthaginian

Today I went over to Mark W's place where my Greeks fought his Carthaginians.

The Carthagaginians had four commands while I had three.

Turn 1 and I was worried about my right flank.

My centre was solid.

I had high hopes for my left wing until the commander decided he was really poor, throwing a double 1 for activation.  But in stroke of genius my expert CinC rolled a double 6 and flashed a charismatic smile which made all the bad vibes go away.

Turn 2 and progress is slow.  My attempts at double moves have ended in disorder. The white squares on the Carthaginian side are command cards which I'm trying out as basically a memory aid to which command has activated and also the abilities of the commander.

But come Turn 3 we are in action on the right.  It looked promising but ended in a stand-off.

Things got interesting with the Carthaginian Gauls who are impetuous.

My elephants were struggling.

My left were progress is poor, like the commander.

But Turn 4 saw the enemy skirmishes chased away and I've started to master the use of opportunity.

The centre is having trouble rallying.

But we have the first taste of victory on the right when my light cavalry are triumphant.

Turn 5 and I bring the light cavalry back.

The Elephants and Peltasts (white cloaks) keep fighting.

And we are now closing in on the enemy's right.

Turn 6 and again the light cavalry score another victory and this will rout the Carthaginian's left.  The Elephants have also come good.

The Peltasts have routed but my centre is solid and has plenty of pointed sticks directed at the enemy pachyderms.

We had a big infantry stoush on my left flank.  It was bloody and went through a number of iterations.  A flank charge by my cavalry failed, but everything else was favourable.

By this stage half of the enemy's commands had routed and with their other losses it was time for them to retreat.

Great game, but a few things I need to check.  For example, do infantry get their bonus for long spear against mounted if they are hit in the flank?

Sunday, March 20, 2016

Romans go home

Yesterday Stephen and I ventured up to York to defend Briton from the Romans.  Mark of the ANF had devised a scenario for Impetus representing Caesar's invasion of Briton.  James and Mark took command of the invaders.

The first line, light chariots with various weapons.

The Romans land (somewhat randomly) and come splashing through the surf getting disorganised as well as wet.

Second turn and a double move with my chariots resulted in them getting disordered, but they were still able to put some missiles into the Romans.  I sent some light cavalry against the Roman ship that was attempting to provide covering fire.  They proved more effective than expected and the Romans got little benefit from their firepower (one of my chariots was shot up a bit).

Stephen had the left side of the Britons.  Our warbands have just started to arrive.

Stephen gets stuck in while I hold back.

The large impetuous warbands are a bit unwieldy.  Will they be effective?

Stephen's chariots have driven right through the Roman centre.  I've started pulling back my chariots (they have the same morale value as a Roman legion so are not to be wasted).

View from the other side and a doctored photo to fill in the edge of the world.

Whatever was happening here (and I will leave that to the gentle reader's possibly fervid imagination), certainly gave Stephen some excellent dice rolls.

It's always nice to get your own figures in a game.  In this picture there are three of my chariot models, a warband unit and some slingers.  The slingers I am pretty sure were painted in the 1970s.

Not the best shot, but that's my CinC in the chariot drawn by the white horses.  Our poor command structure meant I was trying to keep him close to the main body as it surged forward.

The warbands burst through the chariots and head for the reviled Romans.

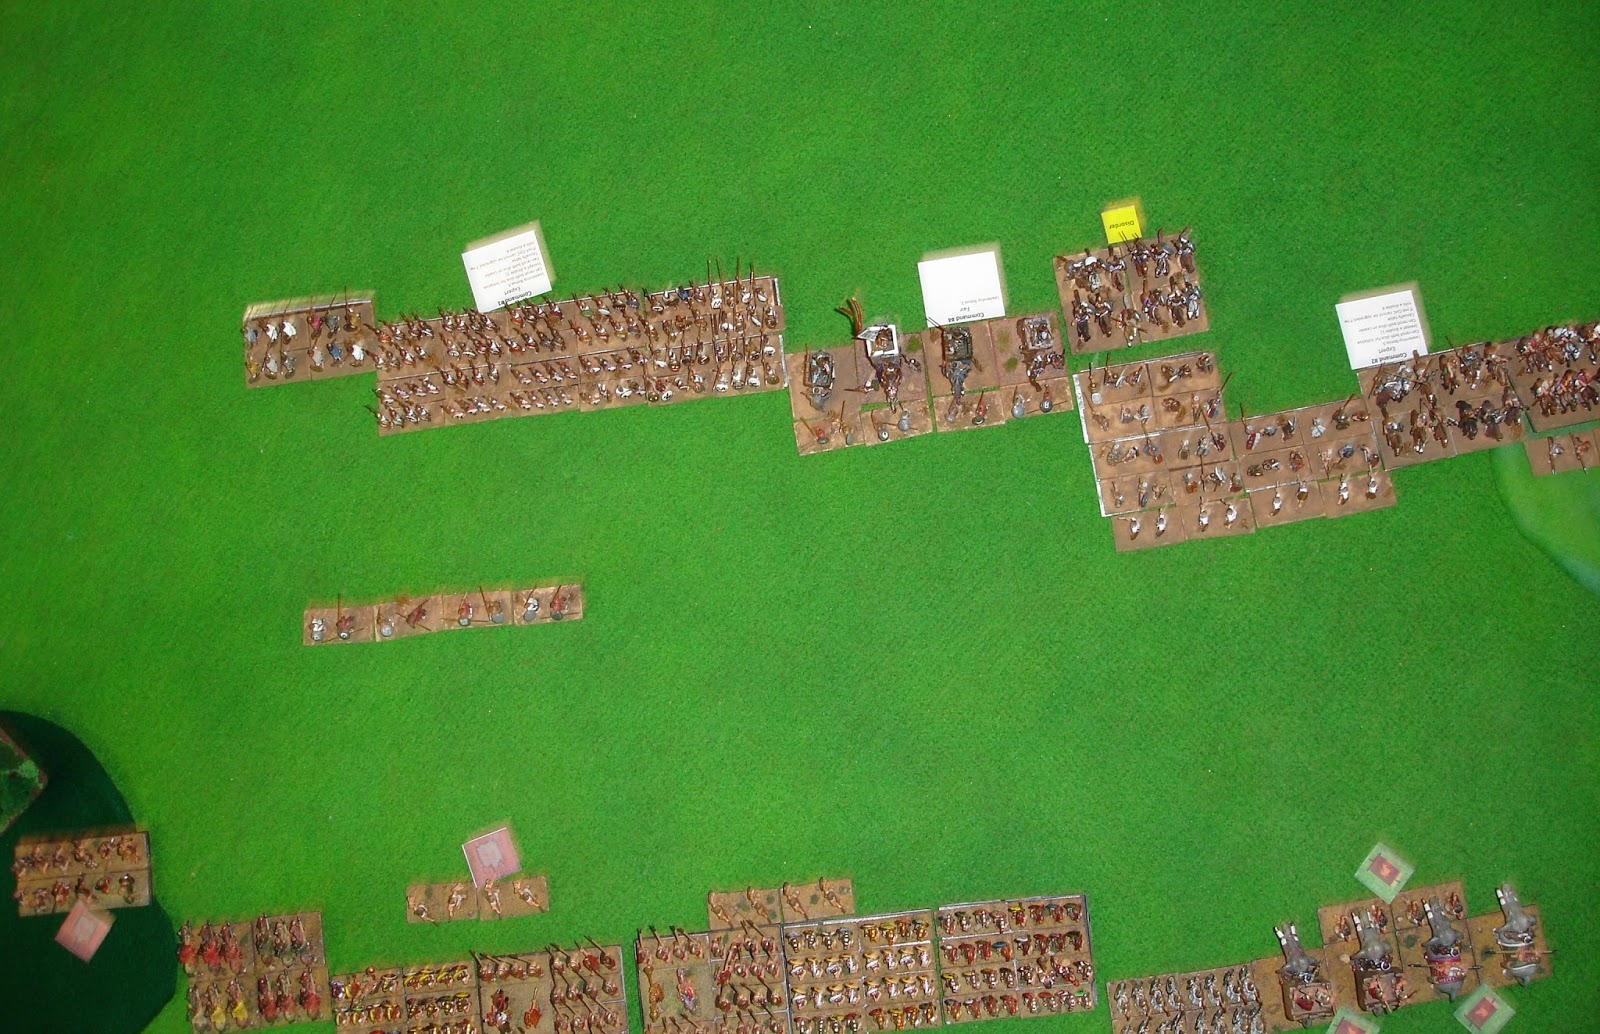
Bird's eye view of the warbands' charge.

Not so many Romans now...
Note Stephen's commander in the crimson cape who has driven the Romans back into the sea (top right corner).

It's been bloody, but the Romans have broken.

Losses to the Britons were two chariots (we had ten), one light horse (sadly mine) and two warbands (both result of throwing sixes on cohesion tests, maybe the dice were not with us al the time).

While it had been hard for the Britons to coordinate their attacks, the Romans never had time to dress their ranks after the initial landing and were basically attacking piecemeal.

Great game and many thanks to Mark and the ANF for staging it and inviting us along.

Addendum


It is much more "balanced" than my report.