Sunday, January 29, 2017

Heart of Oak

In the continuing quest with the ANF for the perfect Napoleonic wargaming rule set, yesterday we (Stephen N, Mark B and myself) ventured out to tackle Heart of Oak with the ANF crew.  Julian had put together the Glorious First of June as the test scenario for these rules.  While we had copies of the rules from Wargames Vault, I think it fair to say I was probably the only person who had been able to make a pass at reading them.  So while experienced miniature wargamers, with some knowledge and experience of naval wargaming, we were completely new and unknown to Heart of Oak.

All ship models are from Sails of Glory.  The game scale was 1 mm equals 1 metre, not very nautical but spot on for the model scale.  The wind was fixed at strength 3 and was from the SSW.  North is the left hand side of the table in the following picture.

The two fleets at set up, at extreme range (about 1.4m)
The French (on the left, downwind) are commanded by Julian with the Van, myself as CinC Centre and James with the Rear.  The British commanded by Mark W with the Van, Stephen as CinC Centre and Mark B with the Rear.

The British Van turns towards the French line.  The French were moving at 8, 12 or 16mm per turn.  A turn was a minute.  We completed eleven turns in seven or eight hours.

The French flagship.  We rolled ship and crew quality and had some strange mixes.  Smart ships with poor crews and Hookers with crack crews.  The French flagship was blessed with a green crew.

The British are now all turning towards the French.  The French line is getting messy as the ships travel at different speeds due to their quality (fair enough) and while only a few mm it soon adds up meaning keeping in formation becomes problematic.  My thought is that Hookers could be restricted to their speed, but Average ships could choose from the Hooker to the Average speed distance and for Smart ships they could select from the range Hooker to Smart.  Otherwise you'd have to fiddle with sail settings all the time.  However, maybe that was the idea. As we were giving battle we all had fighting sail set.

Some of the British ships.  After a few test shots at extreme range we waited until medium range (under 700mm) to start blasting.  Damage was impressive to start with, but soon tapered off, but not before lots of cries of alarm that the concentrated French fire was going to sink a British ship, something that never ever happened they cried.

The French Van did some tacking.  As a result one ship was demasted.

Heat and exhaustion set in and we called a halt.

I thought the rules were playing well.  The scale of the scenario was a challenge, but seemed to be working okay.

I did see an issue with the chance for critical, especially with a poor crew as it meant it was worth their while to blaze away even if there was little chance of creating damage, there was always a chance of a critical.  I would reserve criticals only for full broadsides or just reduce the chance to one percent for continuous fire.

Moving at mm isn't practical.  I find cm hard enough with Impetus.

Sailing when you specify the ship's heading (thanks to Kaptain Kobold for that tip) works a dream.


Thursday, January 26, 2017

Mix n Match

Using pimped SoG models, the aim last night at the club was to try out Hearts of Oak, 
but first have a quick game of Galleys and Galleons

The French are the attackers, attempting to breakout from the British blockade.

The dashing British commander (Mark B) gets an extreme range shot in against the French flagship. testing the metal of the French political appointee assigned to lead the breakout (Stephen N).  
I like it that Flagships come with a random admiral characteristic.

The French return fire, as they venture out into deep water.
The British flagship is "all at sea" but makes a good recovery to bring its starboard side guns to bear,

The French are getting through the British ships, but suffering from the wind that is now trying to blow them back to shore (the wind direction was changing all the time which was a little unusual, but didn't cause too much trouble.  When a ship finds itself caught between two possible settings, e.g. "Close Haul" or "In Irons", I like the captain to choose rather than messing about trying to determine the exact setting which I find fiddly and unproductive).

The French are through.  Damaged, but well on their way to completing the mission.

There is a flaw in this photo, but I kept it as the composition came out rather well.

Same end shot, flaw corrected.

The Order of Battle can be found in this previous post and a previous AAR is also available here. This game looked similar to the other two, but played differently.  We again used an eight point compass, but made the mistake of having the models jump the movement stick rather than just go the distance of the stick - the wind must have been strong and blustery which also accounts for the variability.

Unfortunately our game was interrupted by club business and this meant we ran out of time to try Hearts of Oak.

Saturday, January 21, 2017

Spot the Difference


The out of the box Sails of Glory boats are a bit bland and benefit from some pimping.  Also allows for a bit of identity rigging.

Thursday, January 19, 2017

Early Macedonian Successor versus Medieval French

In my penultimate league competition game for this season I was comprehensively outflanked.

I've never even read the flank march rules and must admit had not given any thought to the game.  I thought my opponent, Richard, had a Roman army.  Wrong!

The French genius commander arrives with half of his force almost on top of my camp which I had cleverly positioned on the flank so it wasn't in the way.  Wrong!

While my right flank hurriedly redeployed, my centre and left pushed on.

My elite heavy cavalry die valiantly buying time.

The right flank looking from my centre.
Turning and realigning is not going well and my troops will end up being engaged piecemeal.

The enemy centre rushes forward and gets disordered.
Hmmm, promising, but too far away for me to exploit.

While my right struggles to face the outflanking force, 
I start to head towards the field in the hope of threatening the enemy flank.

More good news, the enemy commander is not such a genius.  
Merely an expert.

My army seen from the enemy flanking force.
Those knights are VBU 8 and the pike are Discipline A with high factors.
Even if I could present a solid front I would still be in trouble.

The view of the centre, again from the enemy's point of view.

The battle for the field.
My first wave of peltasts get repulsed by the Arquebus A armed enemy.

More good news, my CinC is a genius.  
Who would have thought?

The battle for the field continues as I throw more peltasts and 
my Thessalian cavalry in to clearing out the enemy.

The enemy centre attempting to spread out to cover various potential threats 
(that never arose).

There is still a lot of distance between our main forces...

Except on my right which is getting badly chewed up.

The good luck never ends as my second in command becomes an expert.

The enemy elite knights attack my camp and are defeated.

The field has been taken, but at cost.

But my right flank has broken and with that break my army's morale fails.

Defeat!


Things I learnt in this game:


If the Main Unit pursues, Impetuous, Heavy Cavalry or Chariot Support Units follow.  In other words other troops don't get the option and can't pursue.

Units on Opportunity can only Fire, Opportunity Charge or Counter-Charge (not freely move or do a double move).

Flank Marches (Advanced Impetus - VI)

  1. One command, not lead by an Incompetent or Cowardly General and not comprising more that 50% of the army (in VDs), can be sent on a Flank March.
  2. The Flank March must be noted on the deployment map and include the command and the table side it aims to arrive at.
  3. At the end of every turn the Flank Marching player rolls 2D6 and adds the leadership value of the general leading the Command.  With a result of 12+ the Flank March enters the table at the start of the next turn.
  4. If the Flank March is successful then units belonging to the command are placed at the Player's choice within 12U of the nominated side edge.  They must be placed at least 5U from enemy units (ignore baggage).  If there is no room they can be deployed next turn if there is space.
  5. After deployment of the Flank March the opponent can make a free pivot to face nearest enemy or perform an about face without disorder with any of their units that are closer than 15U to the enemy.  
  6. Roll for initiative as usual.

See the rules for the effects of both sides flank marching, ambushes and failure to arrive.


Saturday, January 14, 2017

WW2 Australian Infantry 15mm – Stocktake

Back to the lead mountain range and see what I have as part of the Australian force.  Just to be on a positive note I'll include what I've completed so far.  Not sure why I stalled.  I can see I repositioned teh command stand, something that was irking me.  Not sure I'm happy how to base the 2pdr AT guns and I recall the Cruiser tanks being a challenge, but I've got one done so must have got stuck considering how to detail it (if indeed I was going to do anything like that).

I do know I want more variety if I'm going to create some Greek militia for Crete.

Completed


4 HMG (3 crew)
2 3" Mortars (3 crew)
18 Infantry bases (4 figures)
12 Infantry bases (2 figures)
9 Infantry bases (1 figure)
3 Matilda II tanks

 Underway


19 figures
2 2pdr AT guns
3 Bren Carriers
1 Car
1 Command base (4 figures)

To Do


3 Mk IV tanks
3 Cruiser tanks
2 Bofors AA guns
8 Brits drinking tea (Peter Pig) - novelty value and for possible militia
8 Infantry (Peter Pig) - for Greek militia

Friday, January 13, 2017

Burgundian Ordonnance versus The Kingdom of Sicily

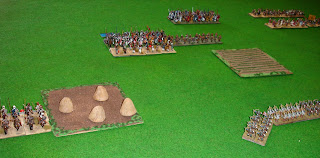
Only two hundred years apart... yesterday my Burgundians fought Mark Woods' Kingdom of Sicily army in a close run, exciting game of Impetus.  However it did get off to a slow start.

The Sicilians in three commands, each commanded by fair commander.

The Burgundians in two commands, the one on the left commanded by a so called expert while the CinC claimed to be charismatic.  The dice would decide about that.

Skirmishers and light horse advance on the flanks, but the Burgundians were basically sitting in one spot (did I say we got off to a slow start, my troops didn't really start).

Some Burgundian skirmishers reach the haystacks first, but their success was to be short lived.
The haystacks acted as a wood for terrain effect (Note 1).

The expert seems only fair.

The Sicilians are making a determined advance.

The Burgundians wait for opportunities.

The Sicilians have won the battle of the haystacks, but at a cost.  
That unit of Sicilian light horse on the far left of the photo 
takes a good while before it comes back into the photostream.  
It has a sticky end (see Note 2).

Still plenty of green separating the armies.

F!
Charismatic general not so charismatic.
This was after using his reroll ability in a desperate attempt to go first 
(that might have been the expert's fate - memory plays tricks)

The view from behind the Sicilian lines.

The red magnetic marker signifies disorder.

The Sicilians are a mix of troop types and do not claim to be historically accurate, 
but are wonderfully modelled and painted.

One of the fair Sicilians is poorer for this die roll.

The Burgundian longbow worked hard to halt the Sicilians.
On the left flank they had amazing success.

In the centre.
Did I say the Burgundians have guns?  
Big and small

The once charismatic Burgundian CinC

Sicilian knights, despite the loss of most of their covering force of archers, 
have pushed into the Burgundian left flank.

The Burgundian CinC is itching to charge...

The Burgundian left flank is in danger, 
but never fear when you have Longbow A equipped troops.
(Note 2)

A unit of Sicilian knights is mauled by some crossbowmen who fought magnificently.

The far right where the Burgundians are doing a wide outflanking manoeuvre.

The Burgundian CinC charges!

Sadly the double move to contact resulted in disorder, 
but look at all those dice.

Sadly the enemy knights launched a very successful counter charge.
The Burgundian CinC is captured. 
(PS we failed to consider the loss of a Charismatic commander, 
but as he had been down graded I am assuming it no longer applied)

The Burgundian right seen from the Sicilian side, 
after they had wiped out the Burgundian knights after the CinC's failed charge.

The Sicilian infantry advancing as they now smell victory

The right wing Sicilian knights have closed round the flank.  
It is looking grim for the Burgundians.

Prepare to defend the camp!

The Burgundian right flank fighting for their lives.

The Burgundian left flank fighting for their lives.

The Burgundian camp is lost

The Burgundians triumph on the left.

And survive the onslaught on the right.


The loss chart tells a close story.  The #1 Sicilian command has broken and that counts for 12 points.  Their other two commands have lost a total of 9 points which puts their army at exactly their breakpoint.  The Burgundians have lost a total of 15 points plus 3 for the camp, 2 short of their breakpoint.  Victory snatched from the jaws of defeat.  


Notes:


1. We were surprised to find there is only a penalty modifier for firing at troops at the edge of a wood.  The Burgundian skirmishers who had made it to the haystacks received no protection from the javelins of the enemy light horse who had entered the same area.and were at point blank range.

2. There was a Sicilian light horse unit that was interpenetrated multiple times and moved a significant distance sideways as a result.  It didn't do it any good as it ultimately found itself in the line of fire of one of the Burgundian mighty Longbow A units.