Saturday, February 25, 2023

Work in Progress - Classical Indians

It hasn't been all games during this February, I have been working on this army, but unusually for me, haven't been doing it a unit at a time, but kind of all at the same time.  This is where I am at:

Elephants will be on separate bases.
The one already finished was a gift received almost 40 years ago
and featured previously in this post.

Chariots, will also be singles, but I still have some thinking to do about them.

The heavy foot and some skirmishers.

Archers and cavalry almost completed.

Instant army, just add paint and flock!  Ha ha!

I have had most of these figures for 10, 20, 30 and in one case close on 40 years.  The motivation to do them now came from reviewing the Impetus Alexandros campaign and realising that Classical Indian was one opponent for Alexander that I didn't have (don't have Persians either, but Mark B does and he is the one who will be attempting the campaign with me).

Originally figures were acquired with an aim to provide an Allied contingent for a WRG 7th Edition Alexander Imperial army, then they were going to be a DBA army, but now it will be a Basic Impetus army.  Some of these figures were bought using a voucher I had won during a DBA competition, so as you can see, there is  a bit of figure collecting history here.

For the obvious novelty reason I painted up the Maiden Guard unit back in the WRG days.  I've just made a post on those ladies and they can be seen here.

Maiden Guard

These are blast from the past.  While working on another post I referenced this unit and found I had not posted about them previously.  They are from the late 1980s give or take a few years.  Not sure they have every been taken to the tabletop and still seem in good nick, apart from the flock which has faded, or rather lost its green colour (or probably more correctly, lost its blue tint).

Enjoy!


Thursday, February 23, 2023

Nikephorian Byzantine versus The Huns

In a competition game my Byzantines faced Stephen's Huns.  I was feeling confident and was not disappointed.

Outscouted, the Byzantines were blessed with some difficult terrain protecting their flanks.

The Huns advance, intent on shooting it out.

The first casualties start to appear,
but the Byzantines can out shoot their opponent.

Arrows fly everywhere

The Huns lose their first unit,
quickly followed by another one.

The charge of the Byzantine elite cavalry was a success, 

The Byzantine light cavalry try to breakthrough the Hun skirmishers,
while their own skirmishers on the opposite flank have been routed. 

The Byzantine light cavalry has been roughly handled,
that broken terrain must have been harder going than it appeared.
However the Huns are now down four units and another loss will break their morale.

With their left flank threatened, the Byzantines 
need to rout another unit of Huns in order to claim victory.

Victory, although another Byzantine unit was also lost.
Interestingly, the red and white legions had not moved during the whole game.


Wednesday, February 22, 2023

Barbarossa - Completion of Turn Ten and part of Turn Eleven

Turn 10 finished with Soviets in situ in the north and centre, but pulling back in the south, effectively clearing out of Bessarabia.

For 12/13 July (Turn 11) the weather reverted to clear in the north and centre, but with some lingering mud, but a mandatory mud turn occurred for the south (this is after five clear weather turns you apparently must have some rain).  

The following images are just the declared Axis combats after air combat and AA fire for Turn 11.

A small bit of mopping up in Courland

AGN attempts top breakthrough near Pskov.
It went badly for them.

AGC is now up against the river line of the Dnepr.
Their attempts to fight their way across were thwarted.
(Richard threw four 10s in a row on a CRT were a low roll is good)

AGS wallows in the mud,
but still launches three successful attacks.
However the Soviets have pulled back so it is a hollow victory.

So ended this session.  Axis motorised and then Soviet turn to do to complete Turn 11.

Sunday, February 19, 2023

Senno July 1941 - Take Two

Previous game's AAR using this scenario can be found here.

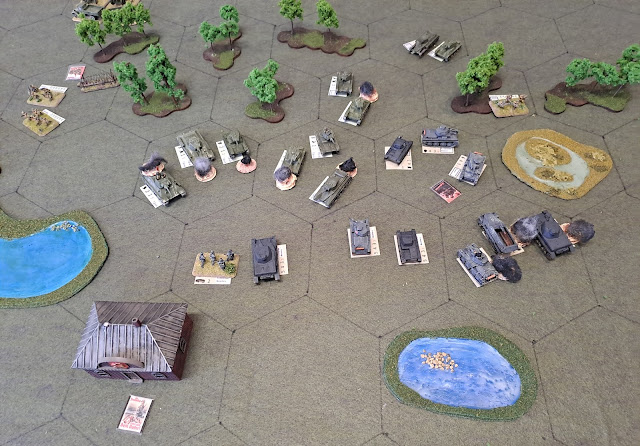
This time Simon went the Soviets assisted by Olivier while Stephen and I each took command of one of the two 7th Panzer Division's Kampfgruppen.

The advancing 7th Panzer Division runs into a counterattack
by the Soviet 7th Mechanised Corps

The Soviets had a plan: advance, seize three of the six objectives, dig in and let the invaders wear themselves out attacking.

Soviet outflanking force arrives and is engaged by the panzers on the right flank.
This was perhaps the most fluid part of the battlefield.

While the fighting continues on the right,
the Soviet armour has been waiting for the panzers to attack.
They didn't have to wait long (game is only 8 turns per side).

The right flank is now just a diversion 
as the Soviets have plenty of troops there to absorb whatever 7th Panzer can throw at them.
The real action is in the centre were both sides have pulled in troops from the other flank,
in order to push the attack.

7th Panzer have captured the central objective held by the enemy,
but the Soviets make a determined attack towards the other central objective, the urban area of Senno.

With just one turn to go the 7th Panzer were able to rush reinforcements to stop the Soviet attack,
dead in its tracks 
(helped by a couple of Soviet poor die rolls it should be stressed)

Game played well with plenty of decisions to be made as to best course of action.  Took about 4 to 5 hours.


Friday, February 17, 2023

The Battle of Carrhae - Take One

Having read the book and dreamed up (and posted) a bit of a scenario it was time to give it a play through.  Mark B took command of the Parthians.

Order of Battle


Special Rules

The table is bereft of terrain.  The Roman deploys all of his forces first, then the Parthian.  

The historical deployment would be a box formation (i.e. a square with the cavalry and allied troops in side), but the Roman is free to try a linear deployment if they wish (should they do so, the Parthian player is not restricted from deploying within 4H of the side edges).  The use of aggressive deployment represents Crassus' desire to get into combat.

The aim is for the Romans to cross the table (at least half the force touching the Parthian table edge) and then to return and exit off their starting table edge.

The aim for the Parthians is to break the Roman army's morale.  If the Romans break the Parthian army's morale they win (and the crossing the table aim is rendered obsolete).  

Parthian units that evade off the table can return in a subsequent turn, provided the evade was from a charge declared by a Roman FP.  The point of return can be anywhere on the table edge they exited from  within a full move distance (i.e. 4H+2H).

All the Parthian CL are VBU 4 representing their plentiful supply of arrows.   

The Game

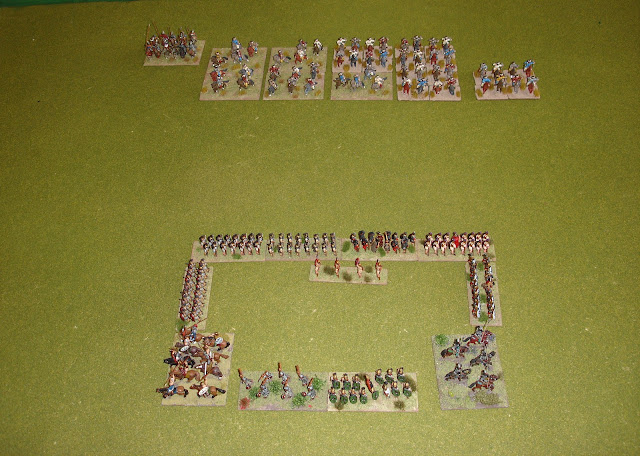
The Romans in a box formation face massed Parthian horse archers.

The Romans advance  into a hail of arrows.
Their precious skirmishers bravely withstand a charge.

Seeing that the Parthians are not trying to close round their flanks,
the Romans start to expand.

The Romans suffer their first lost unit,
but have routed a Parthian unit so all it's not all one way.

The Romans struggle to advance,
needing to halt to recover their order.
However they try some outflanking of their own.

Parthian cataphracts are readying for action,
as the Romans try desperately to press ahead.

The cataphracts are having a hard time of it,
but the Romans are continuing to suffer casualties.

The action appears to be on the wings.
Another Roman legion has been routed.

The cataphracts are being showered with javelins.
The Gallic cavalry is also suffering from missile fire.

The first horse archer unit has fled off table, but allowed to return.
(extreme top left hand corner is the "holding" box)
The Roman skirmishers have been routed.

Another horse archer unit has been destroyed,
but the Romans have lost their Gallic cavalry contingent.

Another two horse archer units left the table,
and critically the Parthian cataphracts along with their general have perished.

At this stage, if it wasn't for the optional rule to return units that have left the table,
the Parthian morale would have broken.

A fourth horse archer unit has left the table.
The Romans have just about reached the table edge, but can find no sign of any Parthian camp.

It is starting to look glum for the Romans as the Parthians have now swept round their left flank.

Time for the Romans to head back,
but oh dear, 
their morale has broken.

Consideration


Making the Parthian horse archers all VBU 4 certainly improved the chance for them to inflict shooting casualties (roughly from a one in six to a one in three chance).  It also meant that they had more chance of matching a Roman unit in combat especially after the Romans were disordered or had lost a casualty.

The returning after evading off table was suspect and I would not continue with that option.  The Parthians should be able to make better use of the table space available.

The object for the Romans to cross the table needs a bit more thought as to what constitutes this being achieved.  Perhaps all it requires is one Legion to make it before retreat is called.


Wednesday, February 15, 2023

Barbarossa - Completion of Turn Nine and part of Turn Ten

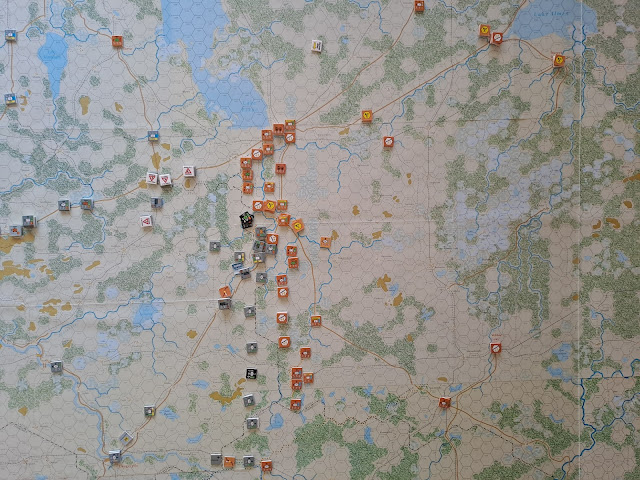
The session commenced with the Soviet turn.  The following images are at the end of Turn Nine.

The Northern Front

The Central Front
(apologies for the dump of Emergency Supply counters on the RHS)

The Southern Front

Turn Ten or 10/11 July 1941

The good weather couldn't last and the northern and central maps descended into mud.  Weather changes supply ranges, and various terrain aspects also become different affecting play (which means more checking of rules and studying of charts - always a dangerous thing as we found we had made a few mistakes, most critical was finding Riga was just a city, not a major city which means ZOCs would not have been blocked.  Whoops!).

These next four images are the declared combats by the Axis.

South of Lake Pskov the Soviet airforce made a surprise showing 
as the Axis tried to smash the first of two defensive lines.

Army Group Centre used the bad weather to mop up 
isolated Soviet units

Army Group South makes a critical attack on Ternopol (centre left)
clears some roadblocks in the centre
and makes an important thrust (to the north of centre)
to clear the road/rail line leading to Kiev.

The Romanians still have some work to do to liberate Bessarabia.

These final set of photos are from after combat resolution, but before the Axis motorised phase.

AGN stalled.

AGC spread out before the Soviets holding a formidable defensive line based on the Dnepr River

AGS has cleared all its obstacles, but plenty of Soviet units remain.

In Bessarabia it is going to be slow and bloody work