Sunday, August 26, 2018

Byzantine Foot

After my impulse buy of these second hand figures and then seeing that I could create a generic Byzantine army for Basic Impetus I got stuck into to tarting them up, focussing on flags, faces and bases.  They got to the 80% stage really quickly, but then I stalled with flocking the bases (I want more tufts) and flags.  The flags were sourced from images I found on the Internet and I had a few goes to size them to my liking.  They are still a work in progress and all detachable.

Major inspiration for this army came from one of Archduke Piccolo's blog posts.

Three units of Skoutatoi with their supporting archers, 
an independent unit of archers and the Varangian mercenaries.

 The main flag gave me a lot of grief and the other units are yet to receive theirs.

 Perhaps a few more archers to pad out the base would have been good, but... nah.

 The front rank centre figure has had his spear replaced by a brass tube 
which takes a flag mounted on a pin.

 The other flags have been designed to slot over the existing spears.
There is not a lot of paint on these figures,
it is amazing what a wash can do (brown for flesh and black for everything else).

 One uniform is red, another white and these guys are green.
There is no historical basis for this, it just seemed to happen.

 The third unit of Skoutatoi can only be fielded if the Varangians aren't used.

 A bit sparse, but a few more tufts should do the trick.

 The archers, including the supporting archers are T troops in Impetus 
and are mounted on a deeper base than the heavy foot.  
This contributes to the sparseness (visual) problem I think.  
However these guys only have a VBU (strength) of 3 and so looking a bit weak is actually okay.

 These are from figures rebased from my Dark Ages army that were providing my Viking forces, along with some figures given to me by Archduke Piccolo.

A mix of Tin Soldier Dark Age figures.

Now to get on with the cavalry!

Sunday, August 19, 2018

Seven Pines Some More

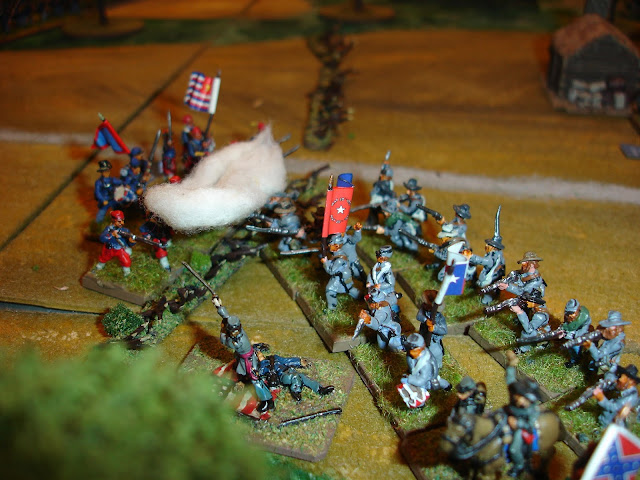
Having the purpose made terrain and being a relatively small scenario makes this easy to put on for a club games day..  I've had it now for a few years and a good number of different people have played it.  Yesterday it was the turn of James of the ANF to take command of the Union defences against the onslaught of the Confederates.  Craig was doing his best to channel Longstreet and it looked like he was headed for a disaster for a while...

 After some umming and arring 
the Confederates decided to charge in rather than engage in a firefight.

 Garland's brigade on the right smashed through Palmer achieving a breakthrough 
that allowed the Confederates to avenged the repulse of Rode's brigade.

 End of the 13:00 turn and DH Hill is pushing his boys to victory.

 Garland continues to attack Palmer after routing a Union artillery battery.

 End of 13:30 and the Confederates, despite the arrival of reinforcements 
are repulsed before the Twin House redoubt.

 End of 14:00 and again the Confederates have failed to take the Twin House redoubt.

 But by 15:00 the Union defenders of the Twin House redoubt had broken.
Fighting had commenced for the Crossroads redoubt.

 15:30 and one Confederate brigade has broken as the Union skillfully alternate the defence of their right wing between the remnants of Casey's division and Deven's cavalry brigade.
The Confederates appear bogged down behind a line of abatis 
and any chance of victory is slipping from their grasp.

 16:00 and the Confederates have taken a beating.  
(James had a run of good die rolls).
Both sides have received their last reinforcements.  
Stephen N takes command of Heintzelman's newly arrived Corps.

 16:30 and in possibly the decisive, but erroneous charge, Kemper's brigade has routed the newly arrived Union force.  The Confederate had formed field column by turning to their right and then charging, but the rules say charge target must start within the front 45 degree arc of the charging unit.  Doh!  Who was umpiring this game?  Oh yeah, it was me.  

 RH Anderson directing Kemper's Brigade against Heintzelmann.

 17:00 and the Union are in trouble. 
although the Confederates can just not get the breakthroughs required.

 17:30 Jenkins, the one remaining fresh unit for the Confederates has fallen back 
(top left of the picture)

 18:00 and end of the game.

 The Confederates might have taken the Crossroads redoubt, but their brigade was spent, so they don't get the VPs for it.  The same goes for the Williamsburg Road.

The Union are left with one worn brigade (Peck seen above) 
and one spent brigade (Develin's cavalry seen in previous picture).  

The Union had six brigades "quit the field" and two batteries wrecked.  The Confederates had at least four spent brigades with the rest worn.

As always an excellent little scenario, but I think it is time to look for something different.

Sunday, August 12, 2018

Reciprocation

A bit of history here with some models that are about to depart for foreign shores.  They are all around 1/76th scale.

 Plastic Nebelwerfer, unknown brand.  (#139)

 T70, from the Skytrex/Hinchcliffe 20mm WW2 range (#156)

 BA64 again from the Skytrex/Hinchcliffe 20mm WW2 range (#148)

 Three Schwerer Whermachtsschlepper from Roco Minitanks code DB6M (could be DBGM).  
They have drop down sides, but don't have whatever it was they were mounting.  
I had thoughts of using them in some kind of Nebelwerfer unit, 
but never progressed beyond thinking about it in twenty years.

An early 1990s visit to Brockhurst Models in California
 resulted in random purchases of all sorts of things.  
Sadly never even opened.
RAFM 6859 RSO German Tracked Truck.

Same visit picked up this with the same outcome.
RAFM 6860 75mm IG18 German Infantry Gun.

Skytrex/Hinchcliffe 20mm WW2 range purchased mail order with living memory.  20/43 is a limber and I was disappointed when I realised I had no suitable horses (I had a crazy idea to use the ones from the Airfix French Napoleonic Artillery set, but they would have been too small).  20/42 is... I forget.  Along with the T70 and BA64 I think I was just getting samples rather than any specific plan.

Thankfully they are about to find a new home with the Archduke Piccolo.  Bon Voyage and may you serve faithfully.

Friday, August 10, 2018

Book for Tognasher Quest in Everquest

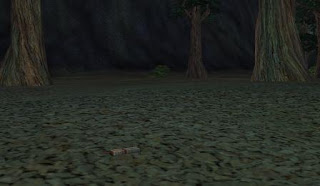
The first page of the ancient book required for the Book for Tognasher quest is located in The Steppes and is a ground spawn in the grove.   It is a challenge, not because it is really hard to see, but rather it is rare and not in the same spot (except for being in the grove).

Eventually I gave up looking in bushes, following satyrs and trying to work out the location coordinates and just ran around.  After a relatively short while I found it.

It looked like this:


I had unticked Allow 2.0 Pixel Shadows and unticked Radial Flora (aka Showgrass) under Advanced Options in the Display tab.

Good luck finding it.

Thursday, August 9, 2018

Ukraine 43 - Turns 10 to 11 and Finished

Today we finished Ukraine '43 when the Soviets achieved six more Victory Points than their historical counterparts did at the end of Turn 11.

 End of Turn 10 and the breakthrough has widened significantly.

The Axis are trying to fight their way out of Poltava.
The Soviet are now at the Dnepr.

Turn 11 in the South and the Axis have gone into full retreat.

 End of Turn 12 in the South.
The Soviet pursuit, although starting to stretch their supply lines, 
caught up and inflicted a major loss around Zaporozh'ye.  

 While in the North the Axis have retreated over the Dnepr.
Again the Soviets are beginning to have supply problems, 
but it has not stopped them so far.

At this point Automatic Victory occurred for the Soviets.  A complete reverse of our previous game.  I attribute this to two things: first I followed the initial walkthrough in the correct sequence this time which saw one Axis unit eliminated; second I focussed on attacking places of weakness.

Vikings versus 100 Years War English Again

After last week's fun game we played again.  This time I tried using the Viking Huscarls and Hird in large units.

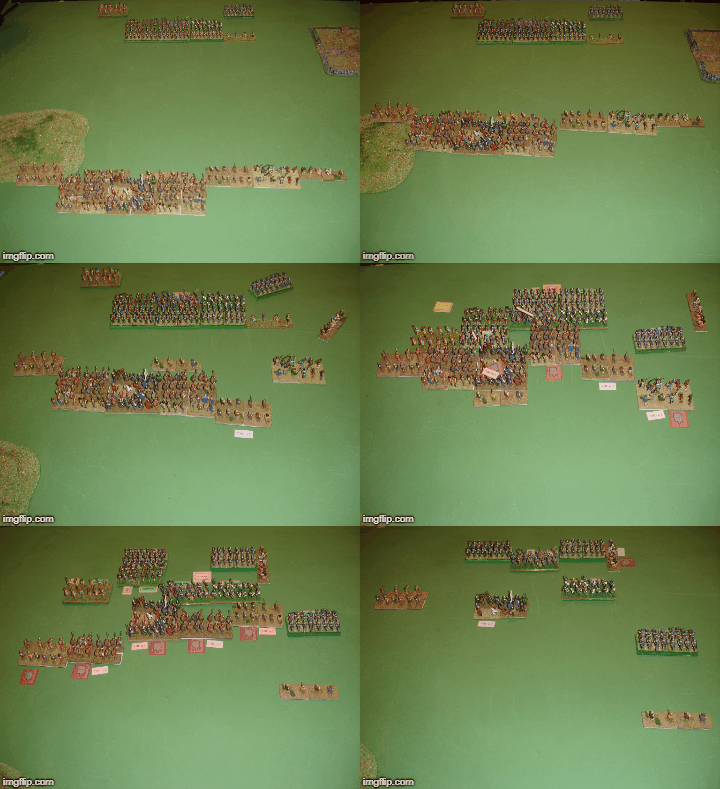
For something different here is the game in a single image: 
Just look at those Vikings evaporate!

The more traditional AAR with commentary now follows.

 Vikings deployed with a skirmish screen.
The English have deployed with a longbow screen.

 Turn 1 and there is no movement by the English.
The Vikings advance.

 Turn 2 is a repeat of Turn 1.

 Turn 3 and English arrows disperse half the skirmish screen 
and decimate one of the Irish javelin units.

 Turn 4 somehow didn't see any further damage from English archery.

 Turn 5 and the Viking Raiders wipe out some English skirmishers.

 Then I pulled out the Ace in the Hole and declared Decisive Initiative.
This time I got my way.

 Turn 6 and the Viking charge was less than devastating.

 Turn 7 and the Viking line is thinning.

 Turn 8 and the Viking line is just holding.
The berserkers have attacked, but without success.
The raiders have been lost.

 Turn 9 and things are looking very serious.

 Turn 10 and it's all over.

The Vikings just couldn't inflict damage.  They stayed around for a good while due to a number of Cohesion Tests that I skillfully passed by rolling ones.  Also we both had promising attacks that caused no hits.  At least my general survived.

Some of these guys are destined to become Varangians in my Byzantine army.