I apologise in advance for the poor quality of some of the photos. I am trying out my new phone's camera.
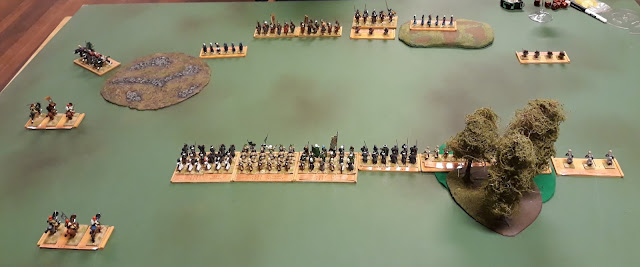
Andalusians on the left, Almoravids on the right.
End of Turn 1 and I had advanced, hoping to bring the enemy in range of my bow fire.
Turn 2 and the Andalusians are trying to get round my flanks.
My skirmishers evade on my right,
but one of my light cavalry units on the left was routed by missile fire.
However next turn the remaining light cavalry get revenge,
but it didn't last...
The enemy cavalry were dented, but not seriously weakened (as it turned out).
On the other flank the combat had resulted in mutual destruction.
By Turn 5 I had again advanced and was feeling confident.
The Black Berbers were destroyed by the Mercenary Christian knights fighting for the Andalusians.
The other Andalusian cavalry was ignoring my light cavalry and threatening my centre's flank.
Ouch!
Things are looking bad at this stage.
End of game.
I was left with one light cavalry unit that was not guarding my left flank, an infantry unit in the centre that was retreating and a lone unit of archers way out on my right flank. Disaster!


Flank attack from cavalry; "Ouch!" Indeed! Is the banner marker on the rear of the bowmen stand a disorder marker?
ReplyDeleteIf your photos ar good enough to follow the action then they are good enough.
Quick battle. At least your suffering was brief.
Very Ouch.
ReplyDeleteYes, the banner represents disorder.
And a quick battle is a good battle.