Simon is my opponent.

I had to deploy first and that has put me at a slight disadvantage.

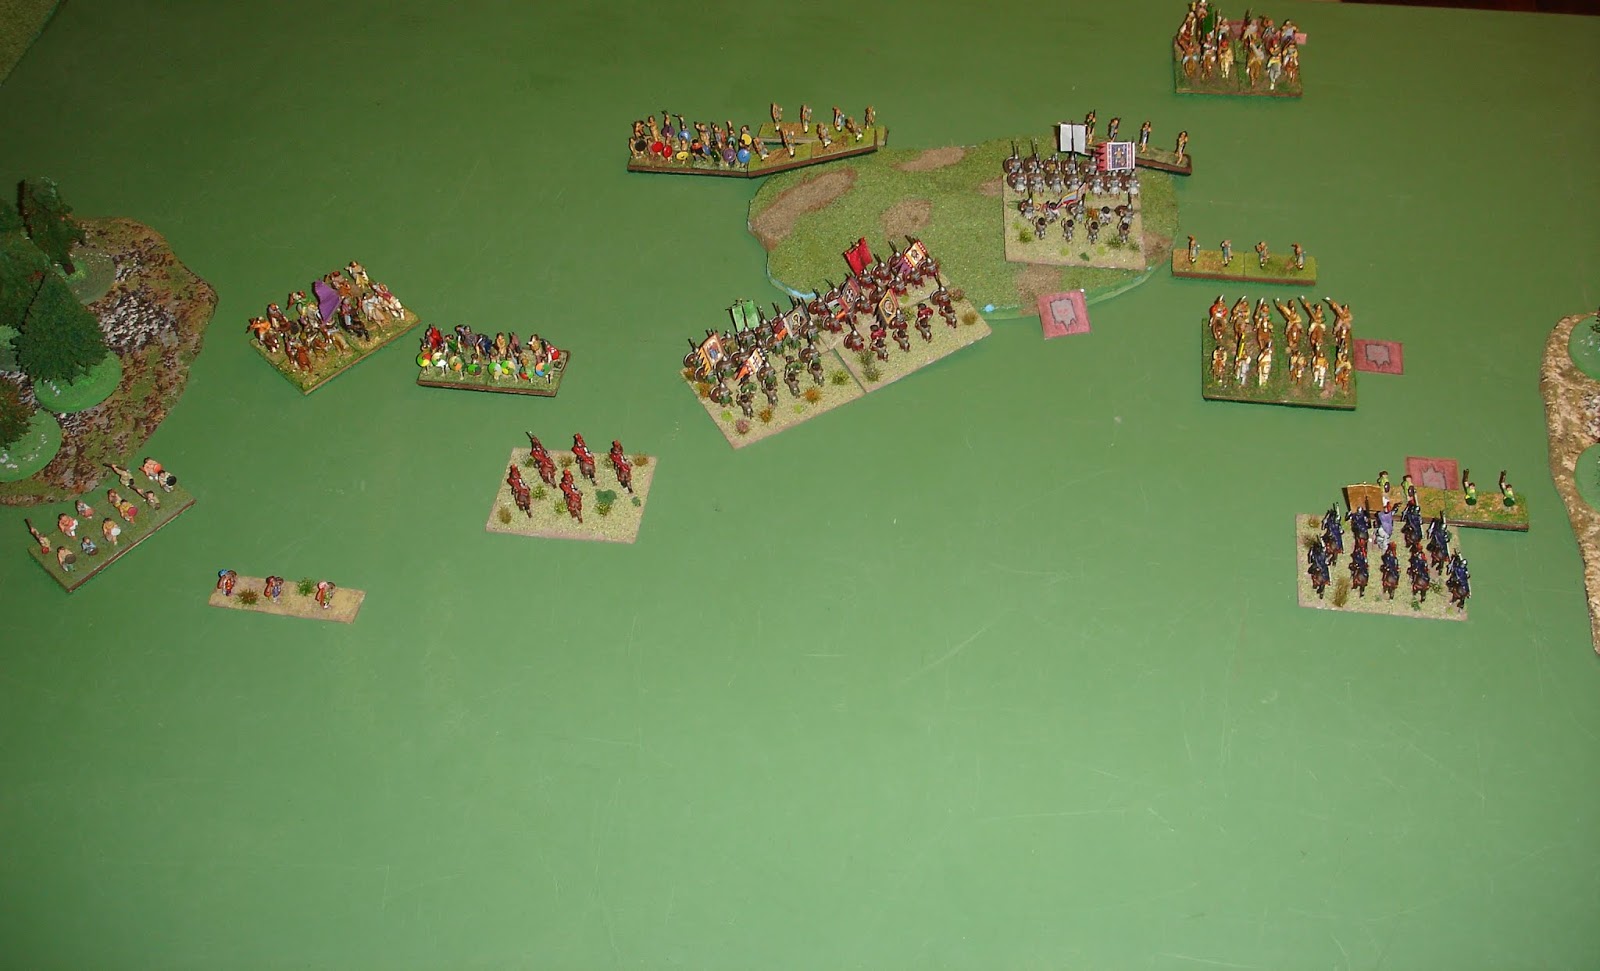
But I have decided to advance.
Disaster strikes and my right wing light cavalry are annihilated.
Three units shot at them, minimum dice, but two got hits.
The first cohesion test was a 6 and the second a 5.
Goodbye light cavalry.

Turn three and my general is having to cover the right flank.
On the left I am busy skirmishing to keep the enemy in check.
My centre is continuing to advance.

I should have easily swept those skirmishers away,
but no, they passed their cohesion test, twice!
Turn four and and things are in the balance...

Turn five and things have changed.
My general is locked in a life or death struggle with the Christian mercenaries.
While my centre is in a race to clear the enemy from their front before they find themselves flanked.
In a further unexpected disaster, my right wing infantry block
were rudely repulsed by the enemy skirmishers.
In a further unexpected disaster, my right wing infantry block
were rudely repulsed by the enemy skirmishers.

Turn six and things are critical.

Then the Christian mercenaries unleash a desperate charge
(they must be getting paid really well).

Turn seven and it was all over.
The Andalusian cavalry had rolled up my centre,
and my general had died fighting the Christians.
It was a bloody battle.
And just to recap...

That final sequence show a dramatic sudden collapse! Deploying second sure confers a disadvantage if the whole army has to do so before the enemy does. Were I commanding the Byzantines, I think I might have made more use of one of the wooded tracts, shoving in the light foot, and anchoring a flank of the heavy infantry on the same wood. All the horsed troops could be massed on the open flank with a flank guard of light horse at, say, a full move's distance off, and slightly rearward. Not sure which wood I would choose - possibly the right. Wouldn't touch the other.
ReplyDeleteI have been wondering how well the 'regulation' tactics laid down by Nikephorus Phocas might work under this rule set. I can tell you this: they are unplayable under DBM and similar sets. The armies you have might have too few elements for it to work under the set you're using. It involves the heavy infantry blocks being separated by an element width, with heavy horse in the rear of the intervals, ready to charge out. Light horse would protect the flanks; light infantry, skirmish out front of the foot.
Maybe I should try it out with my guys!
In Basic Impetus 2.0 you first have to deploy your heavy infantry, then the enemy deploys their heavy infantry. Next is missile troops and light infantry. Then heavy and medium cavalry. Finally light cavalry and skirmishers. As the Andalusians were a very close match to the Byzantine in troop types, it meant they had a certain positioning advantage.
DeleteEach side has a chance to put down two terrain pieces. The woods were mine and I just used them to close off the flanks a bit. They were not beneficial too me, or really to my opponent. I should have given them some more thought.
As for regulation tactics - good question. A lot comes down to troop classification. In BI most of the Byzantine cavalry is classed as Medium, but that just gives them more maneuverability, they still have a good fighting stats etc. Cavalry positioned behind the infantry wouldn't work well in these rules, unless the infantry was just archers or skirmisher. Having to field large units (the foot and archer combination) shortens my front and I often need my cavalry to then cover a flank. However I can run the army in a more cavalry heavy formation and that might be interesting. I'm hoping to finish the last cavalry unit by next Wednesday.
The repeating photos at the end very effectively shows the game with your centre desperately pushes forward trying to seek a victory.
ReplyDeleteThe catastrophic defeat of my centre is well captured in the GIF.
DeleteGreat report. Sounded like you were very unlucky with the dice.
ReplyDeleteHow do you create the moving pictures at the end? This is really clever.
Thanks. I think the luck was more with your brother.
DeleteThe moving image is a gif and just required having a set of photos from the same perspective, more or less, and then up loading to the imgflip site (see their link bottom left of the photo). It is free and very quick and you can change tbe transition speed and a few other things. Challenge is to have the right photos and with mine I normally just cut down so the table edge becomes the top.
There are other sites that do gifs as well I think, I've just stuck with the one that worked first time for me.
Thank you. I shall give it a try!
DeleteThat's some tough luck!
ReplyDeleteWe will test our luck again tonight...
Delete