Friday, October 21, 2011

Operation Mercury - Part 5

23 May
The Germans are now short on supply in the Retimo and Heraklion sectors, but the Luftwaffe do their best to pin down the allies in these areas. The Luftwaffe’s main focus is the Royal Navy, but they were unlucky in attacking a RN task force in Almivos Bay.  However a German convoy was able to elude the RN and land troops in Candida Bay near the contested airfield.  These fresh troops drive the allies from the remaining parts of the airfield. (It is at this stage that I realise I have been conducting attacks with more than six stacking points, but I’m not sure it would have made a big difference and so decide to continue).
The Germans are closing in for a kill at Retimo, while at Suda they decide to work around the allies left flank, but it is slow going.
In the afternoon the Luftwaffe return and this time in Candida Bay the Stukas brave a lot of AA and sink the Calcutta and damage the Coventry and Jarvis. There is then a surface battle in which all the Italian forces are sunk, but with another RN ship going down, the Jaguar.
The Germans fight desperately to clear the area around the Heraklion airfield.  At Retimo their attacks go nowhere and the Australian counter attack is as equally ineffective as is a British attack at Heraklion.  The war of attrition at Suda goes in favour of the Germans.
German night attacks fail to make any progress and are driven off with heavy losses at both Retimo and Heraklion.   But at Suda the Germans are able to swing round the allied left.
An uncoordinated attack by the newly arrive Argyll and Sutherland Highlanders suffers heavy losses at Heraklion, but at Retimo the Australians break through and reunite with the troops holding the airfield.  The allies start to withdraw from Suda.


Saturday, October 15, 2011

Leipzig Table B Scenario - Napoleon's Battles

The plan is to play these in the sequence B, A, D and C.

The first scenario, the attack on Lindenau, had already been played by Richard and the Austrians were able to shoot their way in fairly easily, so this time we decided that a double hit is required on a fortification. For our game on 9 September 2011, Richard took the French side.  All the figures are from his collection apart from some dashing Prussian Hussars dressed in black that were mine.

It took the Austrians until 11:00 to be in a position to attack and this can be seen in the two pictures, the first of the position in front of Lindenau and the second before Connewitz and Dolitz.


The Austrians attacked, seizing the two built up areas of Lindenau engulfing the Confederation of the Rhine brigade which was entrenched in between.

At Connewitz the Austrians succeeded in wresting control of the town from the French. Further to the south, although they had some success, the Poles proved to be of tougher stuff and drove off the Austrian cavalry that had so cautiously advanced through the heavy wood, going much slower than they needed.

French reinforcements arrived and threw the Austrians out of the northern part of Lindenau. The Rhineland troops held on as the Austrians continued to bombard away, slowly whittling them down.


These two pictures are from 13:00 after the French counterattack at Lindenau, but before reinforcements arrived at Connewitz.


Wurtembergers and then Italians were sent to recover Connewitz, but shied from the task.


The Old Guard appeared and retook the town, bundling the remaining Austrians back across the river with ease.

The Austrians pulled back at Dolitz, but at Lindenau weight of numbers took its toll and the French were pushed back to a final line of entrenchments covering the bridge over the Elster River.
 

The last pictures are from 16:30 and the end of the scenario.


This scenario really puts pressure on terrain (as you can see we had a few gaps in our river) and raised a few issues.

When is a brigade in a town compared to being deployed in a town? Is it in a town after occupying the position of any enemy it has dislodged?

Where is it placed? And if it takes up more space, is that right?

Do roads create a clear space in terrain so, for example, a battery can be unlimbered? Do roads negate terrain for movement? Or only if in march column perhaps?


Sunday, October 9, 2011

Operation Mercury - Part 4

22 May

The Germans find themselves short of supply and unable to reinforce Heraklion as they only hold half the airfield.  They successfully interdict in the Maleme and Hearklion sectors and the Luftwaffe goes after the Royal Navy in Candia Bay sinking the Naiad. An uncoordinated attack on Hearklion airfield is easily beaten off by the Allies and there is a bloody stalemate at Retimo as the Germans get desperate.  A war of attrition is also occurring on the way to Suda bay. 
In the afternoon the Luftwaffe keeps up its attacks, sinking the Kandahar in a massed attack in Almivos Bay.

The German convoys set sail. 
There is further desperate fighting at Heraklion, but the Allies hold out.  Things are different at Retimo as the Allies find themselves surrounded and starting to run out of troops to defend the airfield.  An attempt by the Australians to breakthrough during the night is defeated.

Meanwhile on the approaches to Suda the German attacks are not well coordinated, but the recently arrived Mountain Division troops are starting to work around the allied southern flank.
The Royal Navy pounds the Germans around Retimo and Heraklion


Thursday, September 29, 2011

Operation Mercury - Part 3

21 May

Luftwaffe interdictions were not so absolute over Maleme and Heraklion and a morning strike against the Royal Navy in Candia Bay was easily driven off.  The Germans attacked the retreating New Zelanders around Palatanus and vicious fighting occurred around Galatas as the Germans attempted to cut off the NZ retreat.
Fighting at Heraklion airfield saw the Royal Navy successfully bombard the Germans, but in the afternoon the Luftwaffe returned and sunk the Gloucester and damaged the Fiji.  The Germans renewed their attack and captured half of the Heraklion airfield.

The Germans made no progress at Retimo and their attack on Galatas was bloodily repulsed, but they did destroy the Maori battalion which was positioned close by.
The British launched a counterattack at Heraklion even using armour.  However their attack was uncoordinated.  The fighting was desperate and the Germans were very badly mauled, but just managed to hang on.
More bloody fighting at Galatas, but the New Zealanders were able to slip away to regroup at Suda Bay.  Meanwhile the Australians commenced to counterattack at Retimo. 
The plan for 22 May is for the German’s to reinforce Heraklion as the situation is dire.


Saturday, September 24, 2011

25mm Metal Ancients - Javelinmen

This post was inspired by Tim Gow's post http://megablitzandmore.blogspot.com/2011/09/blood-sweat-tears-and-superglue.html

First up here is an old and sadly poor quality photo that I scanned in that shows what is a WRG Ancients 6th addition game (or possibly even 5th edition) from the early 1980s.


At a guess the bulk of the figures would be from my friend Myron's collection.  I never had enough 25mm figures to do more than a unit of barbarian javelinmen ... and here they are:


All Hinchcliffe with one Minifig ring-in to make up the unit.  I was going for the "hairy chested" look.  I also did something I thought was a good idea at the time and had removed their bases.  Doh!

Here are some more 25mm Ancient Javelinmen from my collection:


From left to right they are Hinchcliffe and then Minifigs PB121, PB16, PB177 and PB163.  The basing style was to match in with my playing surface which was a table-tennis table.

Nearly all of them have had their spears redone.  In fact, in taking the unit photo, one of the guys dropped his spear so I need to go find the superglue and effect a repair.

Operation Mercury - Part 2

20 May PM and Night

On the afternoon of 20 May the Luftwaffe very successfully heavily interdicted all sectors.  The drop on Retimo saw the loss of three companies with the bulk of the rest of the paratroops dispersed.  The Germans captured the Maleme airfield after eliminating the supporting NZ troops in the vicinity.  Their attacks elsewhere in the sector were halted or ineffectual, while at Heraklion the Germans didn’t even try to attack.

The remaining NZ troops started to pull back towards Suda and during the night the Germans press home more attacks inflicting heavy casualties as on the NZ force around Galatas.  The Australians start to hurry towards Retimo, but too late to save the 11th Australian Battalion which is wiped out in a vicious night attack by the Germans.

At Heraklion the Germans launch a night attack that captures a hill overlooking the airfield.  However the Allies fight back and wipe out two companies of paratroops that had been surrounded in the morning.

The Royal Navy had tried twice to bombard the Germans moving into engage them in all sectors but with no luck.

The maps are the situation as dawn breaks on 21 May, Maleme, Retimo and Hearklion sectors in that order and the naval situation map.


The Germans plan to drop some more paratroops around Retimo, air land troops at Maleme while trying to cut off the NZ forces from Suda, send the Luftwaffe after the Royal Navy and hang on around Heraklion.

Monday, September 19, 2011

Battle of Shiloh

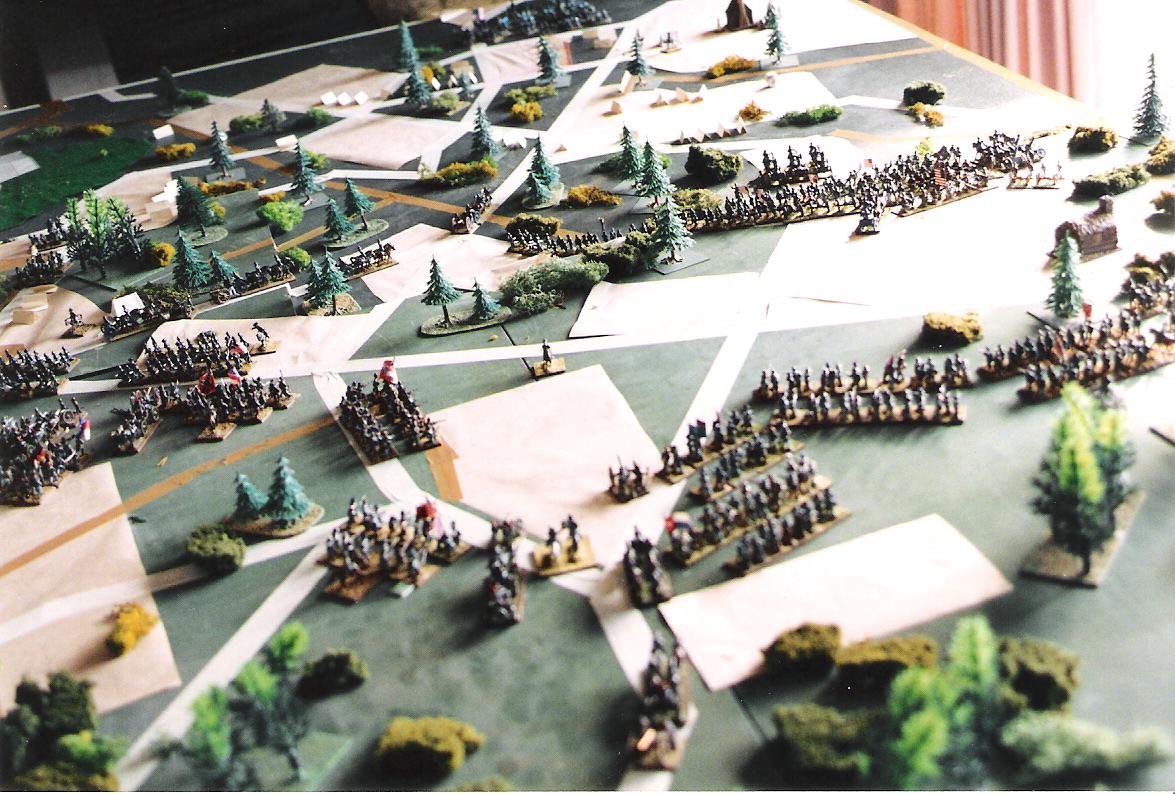
These pictures are scans of photos taken during a refight of the Battle of Shiloh using Fire and Fury.  The only notes I have are that it was 31 December 1992 and that the players on the Union side were Myron, Bruce and Dale while on the Rebs were Brenton and I.  My recollection is that the Rebs did not have the historical success of their namesakes and most action was around the starting position.

The figures were 15mm, mainly Brenton's, but with a few of mine and maybe some more ...