Saturday, February 2, 2013

More bocage, a field and a lone Highlander


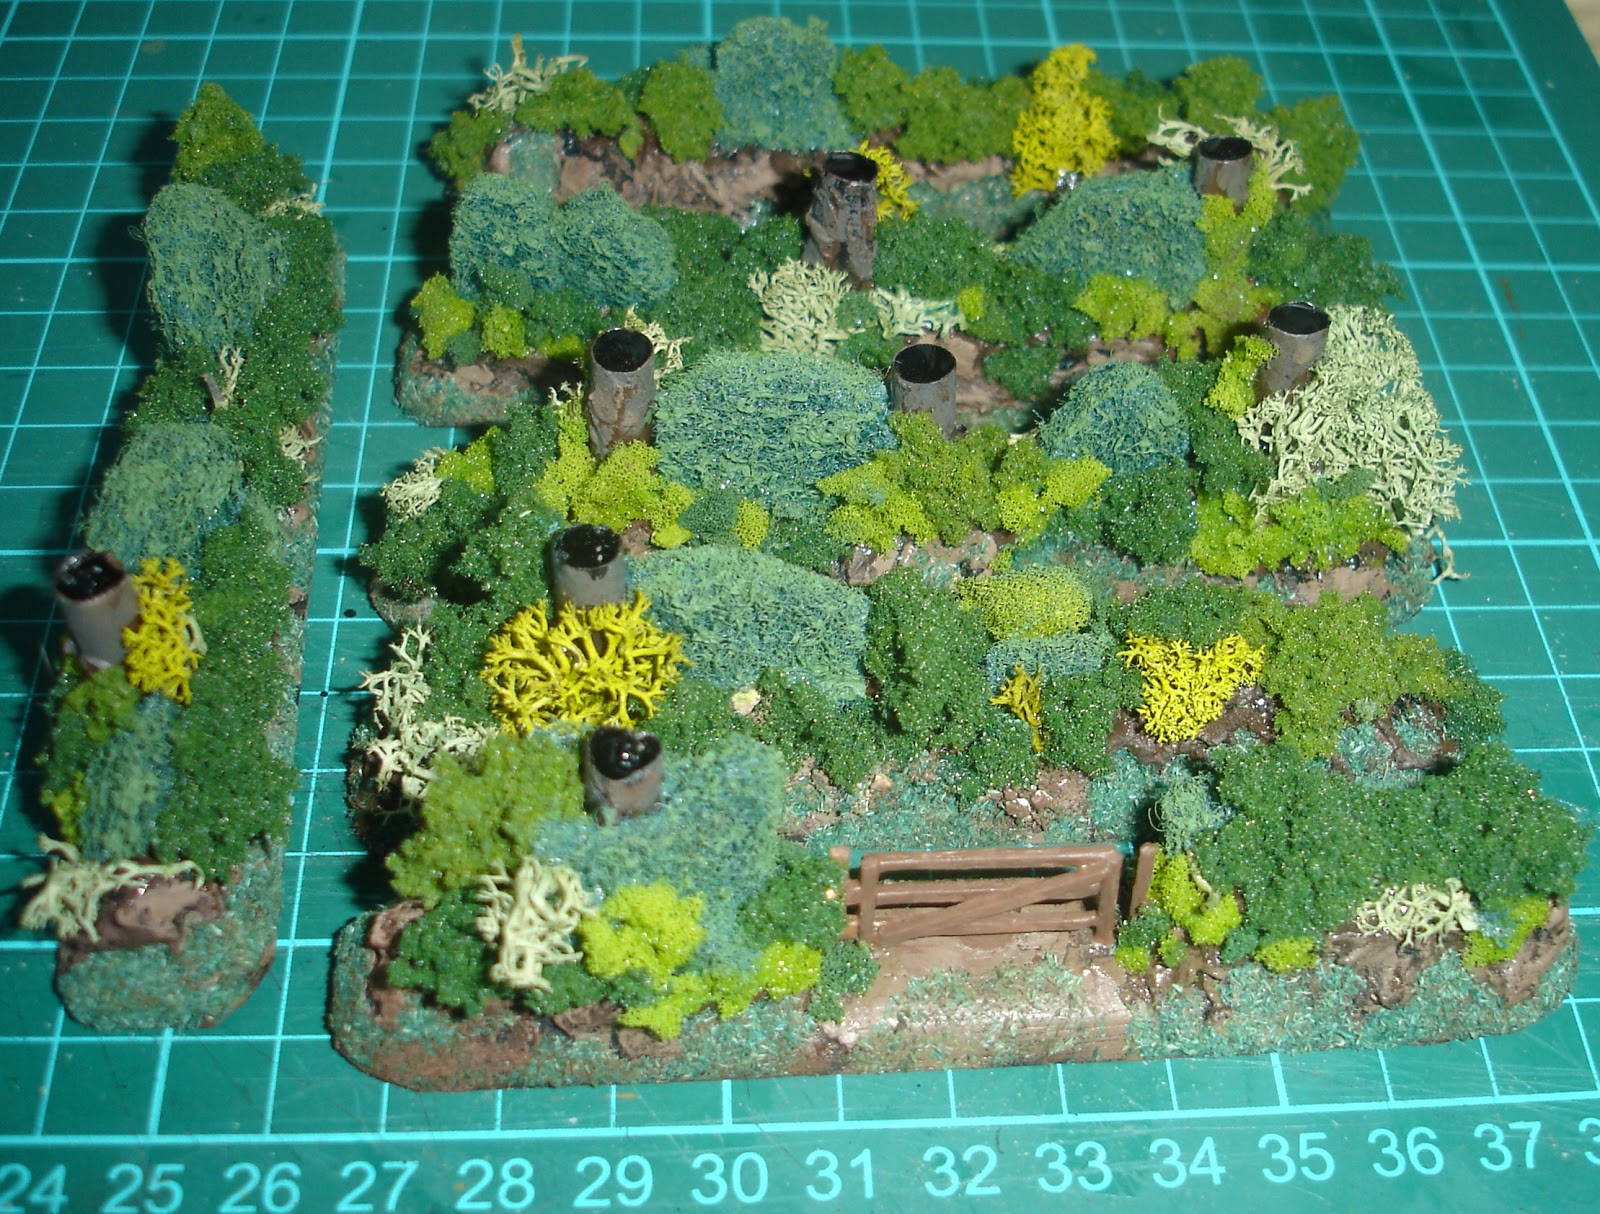
Around Christmas I completed 2.4 metres of bocage.  It doesn’t go very far and so i plan to do another 2.4 metres.
I wasn’t happy with the photo, realising I needed some fields so I had a bit of the cardboard that comes with boxed chocolates in my terrain box and decided to fix that up.  Of course it warped when I glued it to a solid piece of cardboard, but I was ready for that and after a bit of bending I smeared glue on the bottom side and that seems to have fixed it.


While I was doing the bocage I also made up some stone walls (kitty litter glued onto a pop stick) and these, along with the sheep (six bases which I used for my DBM/DBA camps) pretending to be another field (maybe a meadow) are featured in the photos.

Recently I had read a post about a flaw with the mounted officer in the Airfix Napoleonic Highlanders set.  The rear belt is not moulded on the figure.  As I didn’t recall this I dug up the figure I had painted and sure enough, I had painted on the belt to cover up.  I painted this figure in the early 1970s (forty years ago) so no wonder I didn’t remember the flaw.  I was just glad to see I had compensated for it.

Anyway, here he is, front and back, lost somewhere in the bocage in France.


Prussian Blues


For Christmas I received some of the new Fantassin Prussian Grenadiers.  I particularly wanted the figures to have the distinctive monstrous plume and had been putting off raising a grenadier unit as the figures I came across, while looking good, were always in campaign dress.  With my new figures I thought I would also treat myself to a new Prussian Blue and got the Vallejo colour 70965.  I was happy with the first few figures I painted, but then worried that the blue was too bright and not as dark as I wanted.  So I went back to Humbrol’s Prussian Blue colour 5077. 

I over painted a few figures and painted a few more.  The result looked good.

When I came back the next day I couldn’t tell the difference.  Doh!


Of course now I have taken a photograph I can see a difference.  The wounded officer on the far left is the Humbrol Prussian Blue over painted on the Vallejo.  But as to the other two figures... 
What the camera captures and the computer displays are not necessarily how the colour appears to the naked eye, especially taking into account the light (and it is hot and sunny where I am).

Sunday, January 13, 2013

The Russian Campaign

I played this boardgame with Richard for the first time today.  I would have to agree with this statement "one of the finest wargames around. With the ease and playability of the 'Classics', the game also conveys the feel of the actual campaign and is exceptionally accurate historically. Both players will have to use the subtle skills, advantages and tactics of their historical counterparts to win." from the review on BoardGameGeek.

Sunday, January 6, 2013

Invasion Sicily

Yesterday played through GMT's Invasion Sicily boardgame.  http://www.gmtgames.com/nnis/invasion_sicily_main.htm

It was a first playing and while it followed the Operation Mercury rule set we still had to look up various special rules, some of which proved quiet elusive - they were there, but the gamer equivalent of domestic blindness afflicted both of us. Set up time not included, we played for about six hours. The Allies got a bloody nose and the Axis were making a skilful withdrawal although were unlikely to get clean away.

Thursday, December 20, 2012

Bocage – Part 2


The first planting (Photo taken 10:25 AM 17/12/2012):

 
The second planting (Photo taken 5:24 PM 17/12/2012):

 
Detailing commences with a dry brush of Tamiya Flat Earth and the building of the gate out of toothpicks, which was actually quiet fun  (Photo taken 9:57 AM 18/12/2012):

 
Fence gate finished and flocking commences (Photo taken 1:57 PM 19/12/2012):

 
Flocking finished.  I was going to do more work on the hedges, but decided they didn’t need it (Photo taken 6:58 PM 19/12/2012):

 
Bocage finished with matt varnish.  I must make some fields and roads to better show them off, but I’m very happy with the result.  Actually, they turned out much better than I expected.  The surprise “ingredient” was the plastering which ended up looking like tangle tree roots and gives a good earth bank effect I feel.

 
Perhaps the tubes (which are, after all, just cut up black drinking straws) used to hold the trees could be a slightly smaller diameter, but this is really lost on the table top and besides the hedges are supposed to be a thousand years old so good fat trunks are appropriate.  In the “blown up” photo the source of some of the hedging is a lot more apparent than on the table top; perhaps the old scouring pads need more hacking, but they do provide a bit of body to the hedge which helps in handling (which is also a benefit of the embedded straws).

 
And as this was my 100th post, and close to my anniversary of starting this blog two years ago, I feel good to present this completed project.

Sunday, December 16, 2012

Bocage – Part 1


The world probably doesn’t need another post on how to model bocage, but these posts are always more for my benefit, so here goes. 
The work has been pretty quick.  While I didn't keep a record I have put in the time the photos were taken.  Normally I have been working in about 15 minute slots with plenty of time for drying.  I have put in plenty of research (i.e. surfing) time.  There is lots of inspiring stuff out there.

First I bought some semi round wood mould and cut six experimental strips, sanding down the corners so the end result looks like a big brother for the pop-sticks I have been using recently for hedges. (Photo taken 4:10 PM 14/12/2012)
 
Second on with PVA glue, some of the larger “stones” from the kitty litter and a few bits cut off a black drinking straw. (Photo taken 7:30 PM 14/12/2012)

 
Third step was more PVA glue and a finer grade for kitty litter, however in future I would probably drop this step as it was a bit fiddly with the kitty litter scattering a bit too much and the finished result getting largely covered up in the next step. (Photo taken 9:56 AM 15/12/2012)
 
The fourth step was covering with plaster.  I used the type of crack filler that comes ready prepared and as my tube was a bit old I just mixed in a bit of water to get better flow. (Photo taken 1:45 PM 15/12/2012)
 
The fifth step was undercoat in black using trusty Tamiya black and then a base coat of Tamiya flat brown.  I wanted a dark look and hope that this approach will provide that. (Photo taken 10:45 AM 16/12/2012)


Next will be to add the hedge and I’m currently looking at various ways of doing this, but that will be part 2.

Saturday, December 15, 2012

Alexandrian Macedonian Starter Army


After the last game of Field of Glory I checked my ancient figures to see if I could make another army besides Classical Greek.  I discovered I was one stand (3 figures) short of the Alexandrian Macedonian Starter Army, for the Agema no less. 

My Tin Soldier ancient army had been commenced in the mid 1980s for WRG 6th Edition; while predominantly Greek (as in Hoplite) I had started to expand it to cover Macedonia and the Successors as well as rebasing for 7th Edition (and even a bit of DBM although those rules never “did it for me”).  I hadn’t painted any of these figures in close on twenty years – could I match the style or would the new recruits stand out like the proverbial?

As part of the “blending” I painted all the Agema’s cloaks with the same purple and also touched up the older figures helmets with the same gold colour.  The hardest thing to match was the flock which had faded from a yellow green to dark yellow.  I just altered my blend and got a pretty close match.

Completed Agema:


The whole army was upgraded to magnetic bases:


Here is the army ready for battle (or rather ready to be photographed):


Next is to see what troops I have to expand this army with the optional troops and whether there is motivation to take some more figures from lead mountain.