
One of the more useful terrain pieces or markers that I have made.
Currently they are doing sterling service representing tipped units in Rommel.
A friend asked me to send them a picture of one and it inspired me to do this post on how I made them and in the process make a few more. In my last Rommel game I kept missing the combats and so figured a nice red explosion would serve well to mark them.

The fluffy stuff is for cushion or teddy bear stuffing.
The MDF disks are the "holes" that resulted when I made the movement trays for my Mahdists.

The knife was used to trim the MDF base
and the stick then used to poke the wool through the centre hole.
The missing ingredients, apart from paint, are PVA glue and sand.

PVA glue applied.
The resultant dried base can be pressed down to give a flatter bottom.
I haven't found it necessary to file or sandpare them,
just a firm rubbing on a flat surface does the trick.

Ready for the messy step...

The wonders of PVA glue and sand.
It is possible to get a bit of sculpting in with this mixture,
by drawing the PVA glue up the sides of the wool before sprinkling sand.
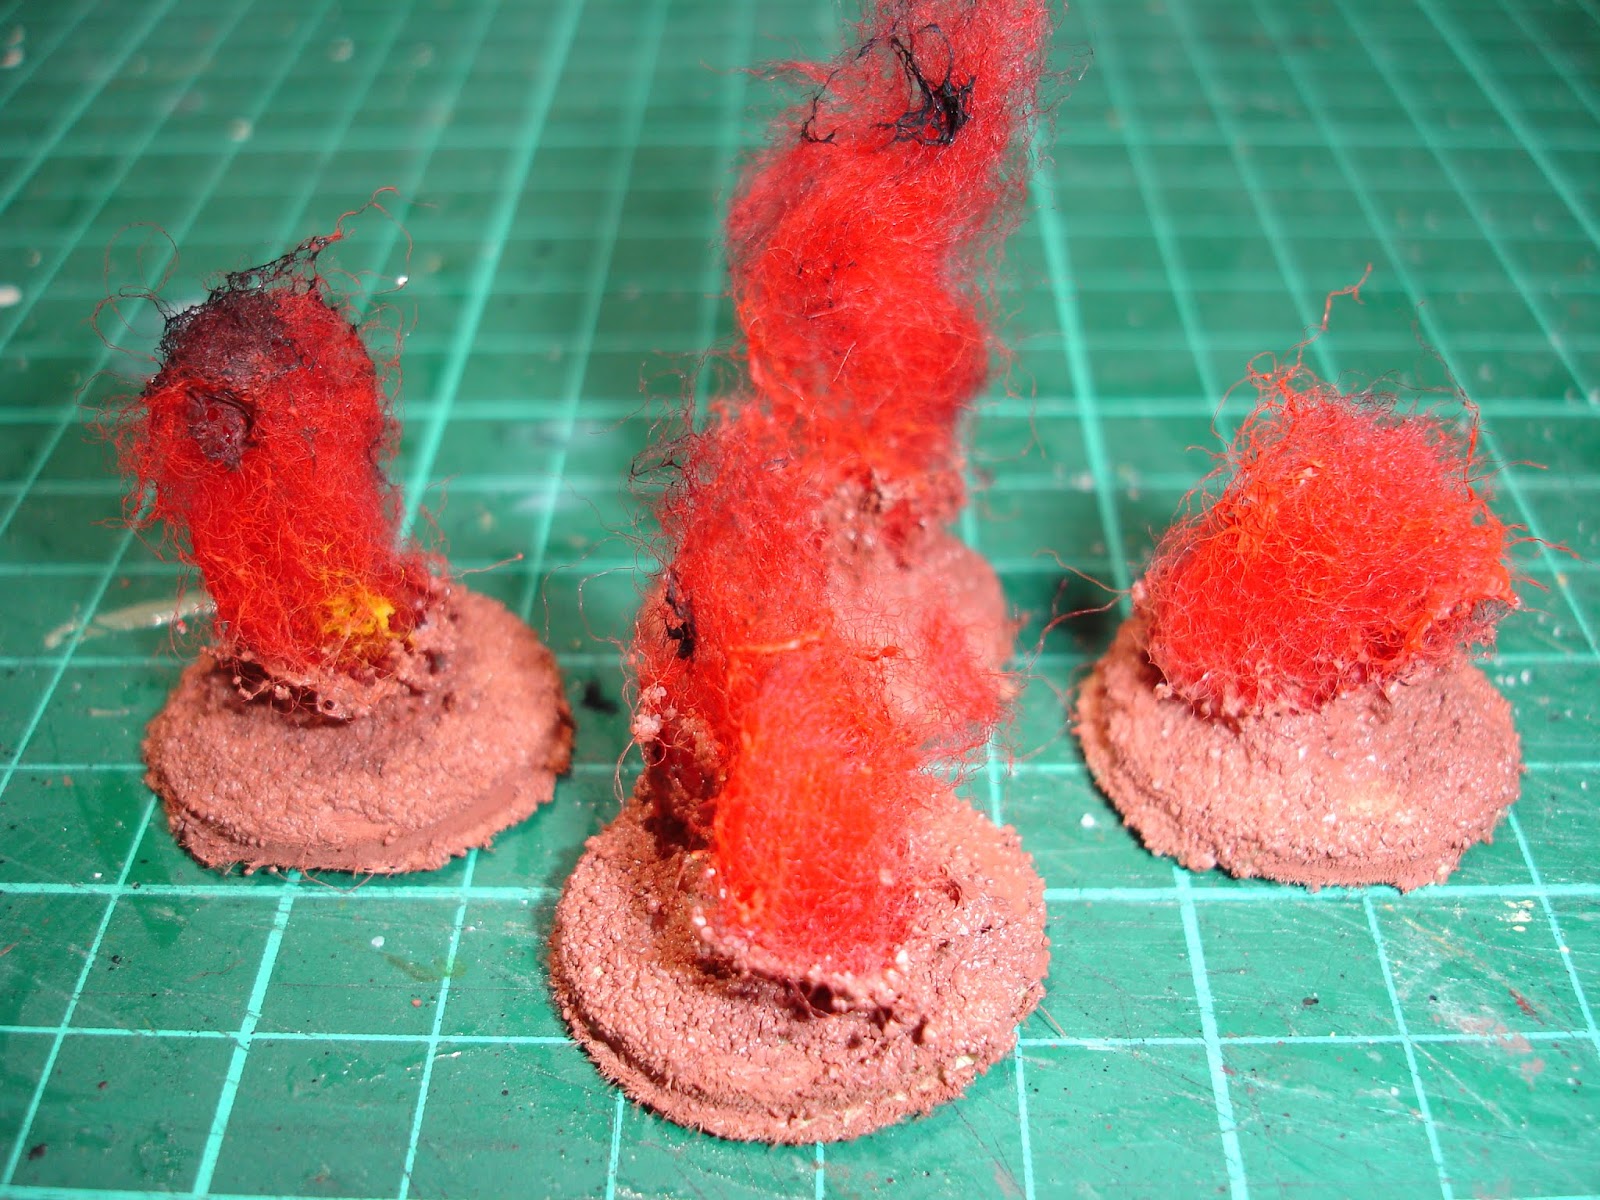
Base coat and adding a bit of character to the flames.

Finito!
what paint did you use for the main colour?
ReplyDeleteThe paints match the desert mat. The base is Red Clay and the top is Rich Sandstone. Occasionally I use Stone Pillar (which is really just slight off white) as a dry brush/highlight. Just have them in sample pots from Taubman's (although not sure they are Taubman's colours).
DeleteMy preferred base is Tamiya's Flat Earth, but with the desert mat I've been making an effort to blend things in. On figure bases I still use the Flat Earth (mostly) but then the Rich Sandstone.
Pretty nifty explosion markers. Nice. 😀
ReplyDeleteThanks
Delete