Thursday, April 19, 2018

Songs of Drums and Pith Helmets

Regardless of how this game played I knew it was going to be a success as it meant that I finally got to use my new terrain mat, plus the some of the Mahdists that I had recently finished as well as some British opponents for them that had come into my possession.

I thought Songs of Drums and Shakos would be easy to adapt and it was except I couldn't find a point system.

There were two squads of British each of one officer and five infantrymen.  The officer was Q3 C2 Leader armed with pistol and sword.  The infantrymen were Q4 C2 armed with rifles.  The leader gave a plus one to Q if they were with one long.  The infantry didn't have to reload.

There were four mobs of Mahdists, each with a flag bearer, drummer and three to four swordsmen.  The flag bearer was Q3 C2 with the ability fervor (which allows a warrior to reroll one fail if they are in range).  The drummer was Q3 C1 and acted to extend the range to one long.  The swordsmen were Q3 C2 and armed with a sword which gave them a bonus in combat (+1 for better weapon).  All the Madists move fast (one long).

 The Madhists were positioned randomly based on a dice rolls (using the benefit of the 12x8 grid).
The British squads entered from each end and had the objective of meeting up in the middle.

 The Mahdists were quickly able to attack Mark B's squad.

 As controller of the Mahdists I kept them hidden as best I could by the terrain.

 Mark B's squad is being overwhelmed.
The red dots represent deaths.

 Simon's squad also came under fierce attack.

 After a gruesome death, the remnants of Mark B's squad flee.

Simon's squad fight valiantly on, but the Mahdists are relentless.

I had only given the force composition limited thought, but was basically happy with it.  Perhaps I had too much terrain that limited the British superiority in long range fire.  Often they were attacked before they could get a shot in, so maybe an overwatch action is required.

Regardless, it was great to get the figures and terrain into action.

Tuesday, April 17, 2018

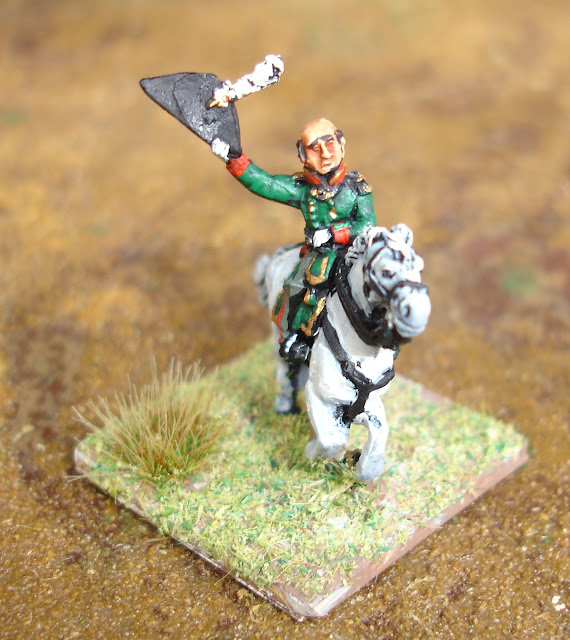
Russian Generals

In researching the uniform details for the Russian generals I came across this site: THE VINKHUIJZEN COLLECTION OF MILITARY UNIFORMS at the https://digitalcollections.nypl.org.

Anyway, these guys are destined for Austerlitz, but are probably in late war uniforms.  So it goes.  The biggest challenge, 1st world wargamer angst, was the colour of Czar Alexander's hair.

Regardless, and even if I do say so myself, the faces on these guys have come out magnificently with what was just a flesh base coat and a wash.

Painting eyebrows on 15mm figures...

 I attempted to go for trousers rather than the boots this figure came with.

 Army command base, with hat waver in chief.

 Look over there, Sir...

 My hats off to you.


 And for this guy, to provide variety, I modelled a bearskin saddle cover.


All together in a frenzy of waving chapeaux.
Or perhaps more correctly: Ысогпе
(Don't ask me, that is what Google translate suggested).

Saturday, April 14, 2018

France 40 - Turns 5 to completion

Yesterday Richard and I finished playing the Sickle Cut scenario.

 The Germans get close to a breakthrough in the centre.

 While in the north I failed to notice that the fortress units don't have a zone of control.
The Germans have broken through.

 But all is not lost, de Gaulle counterattacks.
It achieves little but has lots of promise.

 End of Turn 5, May 17.
The holes in the line have been plugged.

 The Hitler Halt!
A reasonable panic response due to the French counterattack perhaps?

 Rommel keeps attacking however.

 And the Dyle line has collapsed.

 De Gaulle has more success, but at a cost.

 End of Turn 6, May 18.
Again the allies have been able to stabilize the front.
They did have some luck with the timely arrival of reinforcements 
(that come on randomly, north, south etc)

 End of the German Turn 7.
Namur is isolated.

End of Turn 7, May 18.
Again the Allied line has been repaired.

At this stage I suggested we stop playing.  We had worked out that we wouldn't be able to meet up again in a reasonable timeframe to complete the game and both agreed that it was worth playing again, paying attention to the things we had got wrong (major river crossing, allied HQs and a few other things that had probably affected the German's chances of success).

Later I heard from Richard:

I played the game out to the end of the regular game (Turn 10).

The French line collapsed in the centre the very next turn. First there 
was a small but exploitable breach and then the next turn there was a 
huge breakthough, such that by turn 10, the Germans were as far forward 
as Arras. De Gaulle was surrounded in the forest and there was a major 
breakthrough in Belgium. The victory points worked out at 12 to 3 so an 
Allied Victory. (The allies get 10 points if the north south rail line 
is uncut).

I then played through the extended game and after another 2 turns, so 
turn 12 the Germans had reached the coast in strength and there was no 
hope for any kind of counter attack from the allies at that stage. So 
that made the game a draw.

What was interesting was when the breach finally opened, it was just 
impossible to stop. All the allied stuff was just too far behind the 
breach to be able to withdraw fast enough. Food for thought for next games.

Looking forward to playing this again one day.

Thursday, April 12, 2018

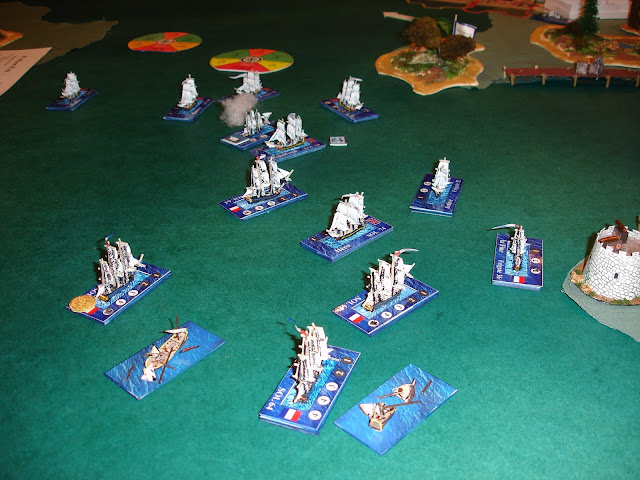
Battle of Porto Praya 1781

Darren, who also provided the ships and terrain, devised this scenario.  He went British and Stephen N and myself went the French.  Information on the actual battle can be found here.

The It's Warm Work rules are simple, but elegant.

 Set up.
The British fleet is at harbour reprovisioning.
The French fleet were heading there with the same idea,
but now see an opportunity to attack.

 The British get in some lucky shots.
Stephen has started his French ships (on the left) at full sail.

 By the end of the second turn the French have started to get some shots in as well.
Note the dice are just for the photos to show which ships have been hit.
The British are still trying to get their crews back and are still at anchor.

 After turn three (representing an hour in game time)
both sides have lost a ship.

 The next turn sees a general engagement and two more ships lost.
The battle is still even.

 Most British ships have recovered their crews and are heading into action.
Darren needs to make some more shipwrecks.
Note the wind direction movement wheels.
Also, the harbour defences are just for show (it is a neutral harbour).

 Stephen's French ships are in trouble, but losses continue to be balanced.
However the British ships have mistakenly turned into the wind
 and we didn't immediately pick this up.

The nefarious British are getting the upper hand, but as it is getting late, we decided a rain squall blew up and ended the game.

The rules worked well as did the scenario.  Action developed quickly and was constant.  I'm certainly looking forward to more play.

Thursday, April 5, 2018

Burgundian Ordonnance versus Sassanids

This was a game in the quarterfinals for the NWS Impetus League.  The pressure is on.  Will my Burgundian Ordonnance prevail against the very nicely based Sassanids?

Pretty standard deployment, 
both sides have their main commands headed by their genius commanders on their left.

End of Turn One as seen from the side of Mark B's Sassanids.

Turn Two and the Burgundians have already shot up and routed one unit of Sassanid horse archers.

By the end of Turn Three the Sassanids are trying to mass against the Burgundian centre.
The Burgundian left is feeling target deprived.

Turn Four and the Burgundian mounted crossbowmen
 who I was depending on to cover my right have been obliterated.
The battlefield is covered by a clouds of arrows.

Turn Five.
Things have turned proper nasty.

A good omen!

Turn Six and we have just seen what happens when elephants are panicked.  It is not nice...
However the Burgundian right is under extreme pressure.
On the Sassanid right their cavalry attempt a desperate charge.

The Burgundian knights charge home and rout the Sassanid genius commander.
Game over as this breaks that command and their army.

The Burgundian infantry has not performed well, 
but critically they were able to hold on long enough.

The Burgundian longbow can be deadly.  While they had a number of misses, they had many hits and were able to mass their fire to deadly affect.  Certainly they were superior to the Sassanid short bow.  The Sassanid cavalry was also forced to take cover behind their archers and unable to get into a strong position to make a swift charge.

It was a very exciting game, especially towards the end as things developed quickly only to turn around just as quick due to adverse outcomes for both sides.  We had melees bogging down, melees producing no results, lucky shots routing units, massed shots - I threw four sixes in one four dice throw - and Mark B then threw a 1 in his cohesion test, Hands of Fate reversing outcomes (for the Sassanids), or getting exactly the same result for the Burgundians. 

Wednesday, April 4, 2018

France 40 - Turns 1 to 4

Yesterday Richard and I started played GMT's France 40 game.  It uses the same mechanics as the Normandy 44 and Ukraine 43 games and so was easy to get in to.

I was France.

 The game starts with the German breakthrough at Sedan, May 13.

 It's a case of the French shuffling units to hold a front line.
Each turn is a classic Move/Combat pair.
Bothe the movement and combat systems have elegant extensions
 providing for overruns and breakthroughs.

 A determined defence holds Charleville, for now...

 End of Turn Two and French are rushing reinforcements to the front.
Overlapping Zones of Control create bonds that can be hard to penetrate.

 Charleville falls and the Germans are across the River Meuse in strength.
Losses have been light, with most combats resulting in retreats.

End of Turn Four, May 16 (each turn is a day).
The Germans keep pushing West, but the French keep regrouping to block them.
A number of French units are bogged down (the GQG counters) due to High Command confusion.
But note the arrival of De Gaulle (top left hand corner).
The Dyle Line is holding (just off the picture on the right hand side) 

We are about forty percent of the way through the Sickle Cut scenario.