Thursday, August 31, 2017

Fire and Fury - Pick-up Game

One of the new things with Brigade Fire and Fury 2nd Edition is the Fictional Army Generator. Craig and I used that at the club last night to create two forces for an encounter to try out the new rules.  His first play, my second (if umpiring counts as playing).

The system generated the following armies:

Union 

Corps - Exceptional Commander
     Division
          1st Brigade 10/9/7 Experienced Rifle Musket
          2nd Brigade 12/8/5 Experienced Mixed Musket
          3rd Brigade 9/-/8 Green Smoothbore Musket
          Battery Experienced Smoothbore
          Battery Experienced Heavy Rifle
     Division
          1st Brigade 13/11/9 Green Mixed Musket
          2nd Brigade 13/9/6 Experienced Rifle Musket
          Battery Experienced Light Rifle
          Battery Experienced Light Rifle

Confederate

Division
     1st Brigade Exceptional 11/8/5 Green Smoothbore Musket
     2nd Brigade 8/5/3 Veteran Rifle Musket
     3rd Brigade 10/8/5 Crack Rifle Musket
     4th Brigade 10/7/4 Green Rifle Musket
     Battery Experienced Rifle & Smoothbore
     Battery Experienced Rifle & Smoothbore
     Battery Experienced Rifle & Smoothbore

The battle was set as Early War, Eastern Theatre.  All the batteries were experienced because we forgot to roll for them.

I was pleased with the generated armies.  I went Confederate.  The challenge was to set up some terrain as this is not covered by the rules.  I would also dearly love a pregame system like Scharnhorst in the Blucher rules - something I must turn my mind to.

I calculated that the maximum number of stands that could possibly be generated for a two player pick-up game would be 104 in 8 brigades with 8 batteries for the Union and 70 in 5 brigades with 4 batteries for the Confederates.

As some of my stands are numbered I thought we could use this to identify the brigades and work off a roster and avoid the clutter of labels.  Even with the small forces, labels would have been much more convenient so next time it will be post-it notes, suitably trimmed if we remember scissors.

The wood on my right is rough ground
 and I decided to direct my crack brigade into it to out flank the enemy.
Meanwhile my other three brigades would launch a frontal attack across the ploughed fields,
which were classed as broken ground.

I had to redeploy my guns forward.
The enemy concentrated their fire on my veteran brigade which was in my centre.

The veterans suffered horrendous casualties but still managed to attempt two charges.
They did not meet with success.

The green brigade on my left made three charge attempts.
The divisional commander joined them for the final one,
but both he and the brigade's exceptional commander were mortally wounded.
The fight left them.

The other green brigade went to cover behind one of the fences bordering the field that it had been crossing.  The crack brigade was just about to burst from the woods when they saw the rest of the division had given way.

There is more complexity with the 2nd Edition, but with my second game I feel I am now across it.  I am sure Craig will feel the same after he reads the rules and gets another game in.

Tuesday, August 29, 2017

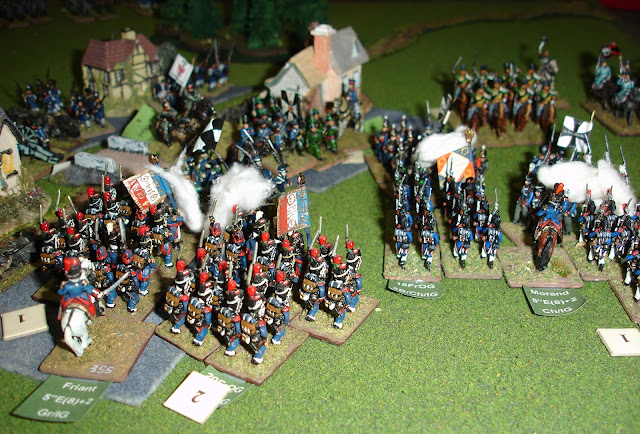
Battle of Ligny - Part Two

We pick up at the 18:00 turn and Blucher leads some Landwehr in a counterattack on the Old Guard.


This was probably the turning point in the game.  If Blucher had succeeded with this attack he would have disrupted the French attack on the village of Ligny.

But Blucher was repulsed and the French line has stabilized and is about to move forward. 

Napoleon is moving the other Old Guard Division to the right to join in the attack on Ligny.
Elsewhere the French are preparing to attack St Amand La Haye 
and have dispersed the defenders of Hameau on the approach to Wagnelee

 The Prussians try to get their defence of Ligny village in order.

Blucher counterattacks to Young Guard who have crossed the brook near St Amand. 

The counterattack was successful
(Nothing like a combined arms attack in Napoleon's Battles to produce results)
However the French have a lot of guns aimed at the Prussians who are now exposed. 

The Old Guard attack! 

The village of Ligny east of the brook has been cleared of Prussians. 

The French are now across in the centre and have captured St Amand La Haye. 

On the French left Jacquinot's lancers are preparing to cross the stream. 

The Prussians flee.

While there was the fighting over the villages (I think the stream makes the Prussian counterattacks problematic), there was plenty of to and fro action.

We did come across one interesting change in the rules that actual runs through all four editions.

Controlled Recall (6.7.5 in the 4th Edition) says that a cavalry unit may move into combat contact or have a react marker placed.  This is the same as the 2nd Edition, but in the 1st and 3rd Editions there was a third option to "move normally".  Being able to move normally does provide a slight advantage as in it would avoid the cavalry unit from getting pinned.  One for the Yahoo group.

Monday, August 28, 2017

Seven Pines - 2nd Edition

Updating the Seven Pines scenario for the Brigade Fire and Fury 2nd Edition rule set was relatively straightforward.  All the Union were green and the Confederates experienced.  Everyone was armed with Rifle Muskets except Union cavalry which had breechloaders.  The Confederate artillery was Rifle Smoothbore and on the Union side,  Casey's batteries were Napoleons and Crouch's Light Rifles.  I didn't look at a casualty level or an objective and stuck with the original VP schedule (which is missing in the 2nd Edition?).

I had made a personal commitment to myself to read the new rules and was glad to have achieved that.  The rules played well.  It helped that Graham, who was observing, also had a copy of the rules and was able to act as a second referee.  Mark W took the Confederates and had a bit of a hard time until he discovered the secret was to throw tens.  Michael was the Union.

The Confederates have pushed back Palmer's brigade, but have been halted by Naglee.

 The Confederates follow up their success with a breakthrough attack on Palmer.

But the Union pushed them back.

The view from the Twin House redoubt.
On boths sides brigades were quickly becoming spent.

The view from the Crossroads Redoubt

The Confederates are still fighting to gain control of the Twin House redoubt.
Ultimately both Union brigades, much reduced, involuntarily pulled back.

With that objective achieved, the Confederates pushed on to the next one.

16:00 and both sides have reinforcements that appear on the respective enemy's right flanks. 

 The Confederates meet with success on both flanks...

But time is running out.  These last desperate attacks had limited success on the each flank and were repulsed in the centre.

The Union lost four batteries, had two brigades quit the field, three spent and one worn, which gave the Confederates 19 victory points using the 1st Edition victory point schedule.

The Confederates had one wrecked battery, three spent brigades and one worn; 8 victory points for the Union.  The Union still held the cross roads which gave them an extra 5 point.

The new rules played well.  A bit more detailed, which is perhaps justified as it covers weapon types and troop quality which were a salient point in ACW battles.  The maneuver and fire tables seemed a bit more decisive.  I like the new fire combat system and the introduction of broken units.  In fact there was nothing I didn't like.  In the five hours of play I think I referred to the rule book once (to check you could charge in echelon - you can), everything else was worked out from the QRS. 

The rule book is of excellent quality, particularly the examples and the inspiring photos of actual Fire and Fury games.  The 1st edition was of course a quality product in this respect as well.  

I'm looking forward to my next game.

Sunday, August 27, 2017

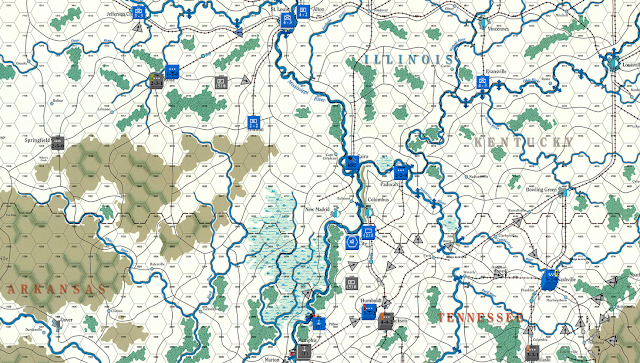
WBTS via Vassal - Weeks 33 to 36

The second cycle for 1862.

Union supply is a scant 154.  Still it is better that the 126 that the Confederates have (and that is with them carrying over 50 - the Union only carried forward 4).  The Union have 80 personnel Points compared to the Confederates 40.

The Union augment 4-3s from Philadelphia, Baltimore and Cincinnati to 10-3s, convert ten garrison in each of St Louis and Washington to four 3-3s and two 4-3s, raise two 3-4 cavalry divisions, 2 militia and 2 garrison.  They have 44 supply remaining.

The Confederates augment the 4-3 in Charleston to a 10-3, convert the ten garrisons in Raleigh and Richmond to four 3-3s and two 4-3s and raise 7 militia.  They are left with 87 supply.

The Union produce 21 militia, five 4-3s, a 10-3, 8-3 and 7-3 infantry division, a supply train, a river transport and an ironclad.  A 4-3 goes to each of Evansville, Philadelphia, Cincinnati, Alton and St Louis, with a 10-3 and 8-3 going to Washington and the 7-3 to Baltimore.  The supply train goes to Washington, the river transport to St Louis and the ironclad to C3901 (the Union know that the Confederates are building an ironclad at Norfolk).

The Confederates produce 6 militia, two 10-3s, two 4-3s and three 3-3s, one garrison, a supply train and an ironclad.  A 10-3 goes to each of Richmond and Memphis, 3-3s go to Little Rock, Charleston and Raleigh, and 4-3s to New Orleans and Richmond.  The garrison goes to Charleston, the supply train to Richmond and the ironclad to Norfolk.

The Union ironclad completes fitout immediately, unlike the new Confederate one in Norfolk. However the Confederates now have their ironclad in New Orleans.

The Confederates are blessed with four new leaders Buchanan (naval - New Orleans), A Hill (Raleigh), Huger (Memphis) and Robert E Lee (Richmond).

A partisan cadre appears in Tennessee.

Thomas replaces McDowell as Corps commander.

Both the Union and Confederates fortify their capitals.

The Confederates have militia demobilisation in West Virginia (1) and North Carolina (2).

The Union consume 33 supply and 3 rail.  They are left with 11 supply and 27 rail.

The Confederates consume 25 supply and 8 rail.  They are left with 62 supply and 7 rail.

The Union get one militia in Rolla, MO, and two in Paducah, KY.

Week 33

What a surprise, zero initiative for the Union.

Not wasting any time, Stuart is told to seal off the Shenandoah valley while Longstreet follows up behind doing a march attack on the Union militia at Winchester.  Both sides lose one factor.

Bragg moves up to cover Longstreet's rear and he is joined by reinforcements from Richmond.

Hill fails to stir in Raleigh - the Confederates need the troops stationed there brought forward.

Bruckner in Charleston follows Hill's lead and does nothing.

Van Dorn and Floyd inspect the new Ironclad in New Orleans, but decline to take her for a sail.  But are then dismayed when Buchanan takes her up the Mississippi seeking glory.

Hardee retreats to Pulaski.

Jackson pulls back to Jackson, but takes himself off to Memphis to get reinforcements.  However Huger surprises him by sending the reinforcements in Memphis to Jackson.

Polk and Price do nothing in Missouri except for trying to stir up trouble.

Longstreet attacks Winchester on the 901+ column of CRT 3 and wipes out the Union militia stationed there.

The Confederates have Burnside trapped!

Burnside is isolated and therefore his initiative is reduced by one (which makes it one).  He fails to make a march attack to break out.  Maybe he will attack?

Keyes hopes to attack.

McClellan doesn't move, nor Curtis, but it is Heinzelmann to Burnside's rescue.

Pope and Buell display no initiative in a direct copy of Polk and Price.  McDowell takes himself to Paducah.  Thomas goes to Columbus to collect his dispersed army.

Halleck, Banks and Crittenden party in Nashville.

Farragut collects his river flotillas and with the ironclad sails down towards Memphis.

Porter starts to return to the east coast with one of his naval flotillas and the new ironclad sails down to sit off Norfolk.

Burnside tries to breakout via Front Royal.  He's on the 251-400 column of CRT 2.  The Confederate cavalry are forced to retreat.  There is no loss and no supply consumed.

Keyes and Heinzelmann fail to attack.

Burnside is trying to breakout, but has he only got deeper into the trap?

The Union raise militia in Washington, Baltimore and Alton.

Week 34

The Union get the 3 chit.  Let's see what they can do.

First up Burnside is ordered to breakout.  He is supposed to move closer to a consumption supply path and interprets this as being in his best interests to do an attack from march against the cavalry division to the south.  He succeeds in forcing it back for no loss (Whoops - I now, during week 35, realise that the cavalry which was in rough terrain, didn't have to retreat).  Heintzelman is ordered to leave one division to block the northern exit to the valley and then to move his corps to block Stuart and aid Burnside's escape.  This requires some forced marches and he loses to 2 strength points.

The other free Union initiative must be used in the West and the easy option is taken to move the small division that was forced out of Jefferson City back to that place.

In a surprise move Pope makes a forced march to Rolla.  He loses a strength point on the way. Thomas force marches to face the troops Jackson left at Jackson, losing two strength points on the way.

Buell, McDowell, Halleck, Banks and Crittenden all have a rest.

Back in the East, McClellan and Curtis do nothing.

Pope, Burnside, Keyes, Heintzelman and Thomas all think about attacking, but only Thomas does. He attacks on the 71-90 column of CRT 3.  No supply is consumed and both sides lose 10% - that is 3 for the Union and 4 for the Confederates.

The Union again raise militia in Washington, Baltimore and Alton.

The Confederates order the 3 strength cavalry division near Harper's Ferry to sweep through that place and then join the other 3 strength cavalry division at the southern end of the valley.  The aim is to trap Burnside and maybe more...

Beauregard is ordered to Front Royal.

Over in Missouri, Price realises that from Jefferson City the Union could force march to Springfield, and quickly moves back there, leaving Polk to face Pope.

Jackson hurries to join his army leaving Huger in Memphis.  Hardee, seeing the inactivity of the Union at Nashville, stays put in Pulaski.  Buchanan and the ironclad sail up to Memphis.

Floyd and Van Dorn do nothing but argue in New Orleans.

Buckner is happy in Charleston.

A Hill takes his division from Raleigh on a force march towards Petersburg.  Magruder hopes that A Hill is coming to his aid so he can whip those damn Yankees.

Both Bragg and Lee fail to move.  Stuart recombines his cavalry corps, trapping Burnside in a tighter noose.  Longstreet sends a division to Newmarket that must all but seal Burnside's fate.

Jackson thinks about attacking, but nah.

Militia are raised in Richmond and Charleston.

The trap has closed around Burnside.

Week 35

The Union get one initiative so the Confederates go first.

The Confederates send the 5 strength division that was sitting idle in Mobile to Grand Junction, TN.  Bragg, who had been getting in Lee's way, is sent back to Richmond.

Lee moves to Manassas which threatens Heintzelman.  A Hill moves to Norfolk to protect the naval base and its precious ironclad.

All the other Confederate generals stay put.  They either have nothing to do, or are best placed (mostly) to wait for the Union to attack.

Lee attacks Heintzelman on the 111-130 column of CRT 4.  They both lose 2 strength points and the Union have to retreat.  If Heintzelman retreats towards the valley he will be trapped.  If he "retreats" south he has lots of options, but lots of risk.  He decides to retreat across the Occoquan River while he still has access to the bridge (and can provide cover for Washington). Lee keeps his army in Manassas.

Burnside is trapped and so the Union need to do something else to try and rescue him.

Porter, fresh from sailing round Florida, lands a few marines at New Berne to prepare for the long anticipated descent on the coast by the Union.  Curtis with a 7 strength division and a bit of militia and supply then promptly sails in.  The infantry division then proceed to wreck the rail line.  The ironclad also sails down to join Porter.

There are now more Union troops in North Carolina than there are rebels.

McClelland displays some initiative and sends Heintzelman some reinforcements.

Buell and Pope are ordered to stay put, but the other generals in the west, who actually have things to do, displayd no initiative to do much of anything at all.  Sad.

Keyes doesn't attack, but Burnside does.  Stuart, while his inclination is to withdraw, decides to stand and fight.  The combat is on the 201 to 250 column of CRT 2.  Burnside uses supply, but Stuart needs to as well.  The changes the odds but not very significantly, now the 251 to 400 column (the ratio was exactly 400%).  Burnside loses 1 strength point and Stuart 2.  Burnside activated to attack on a 2 and I subsequently thought that this should have been reduced to a 1 as he is isolated, but my careful reading of [26.8] indicates that the isolation effect is aimed at activating for movement.  Regardless I think this is reasonable as he is fighting for his life!  Stuart almost became a casualty as well.

Militia are deployed to Washington, Baltimore and Philadelphia.

Week 36

The Union get the one chit again.

Lee is ordered back to Richmond.  He disperses his troops to reinforce Stuart and Beauregard.  The Supply Train goes to Stuart.

The 5 strength division from Mobile is now directed to Jackson's army who is preparing to attack Thomas so as to liberate Jackson.

Hardee takes initiative and cuts the rail line at Tullahoma, TN.

Polk and Price do nothing in Missouri.

Van Dorn and Floyd are told to keep quiet down in New Orleans.  Huger in Memphis is also told to do nothing to which he readily agrees, while secretly plotting to take command of the ironclad and go on an adventure.  Buchanan is not letting him anywhere near the vessel which he knows is worth more in potential than action.

Bruckner stays put in Charleston although he thinks he better get ready given what has happened in North Carolina.

Johnston discuss the war with Lee in Richmond and Bragg listens in, ready to give them his opinion even if they don't ask him for it.  A Hill decides to stay in Norfolk.  Magruder needs to stay put (and needs reinforcements).

Longstreet looks to the security of the valley and various bridges.  Beauregard and Stuart taunt Burnside, but they don't want him to attack them or them him, they just want him to starve...

Jackson attacks on the 131-160 column of CRT 4.  Jackson uses supply.  Boths sides lose 5 strength points.  Thomas has to retreat.  Jackson is liberated.

The Union tell Halleck to get his act together.  Unsurprisingly he consolidates around Nashville with Banks and Crittenden.

Pope and Buell scheme in Missouri.  Thomas and McDowell seem stunned before the terrible wrath of Jackson.

Curtis disappoints and everyone else is best to stay put.  Keyes again fails to attack.

The Union place the last of their militia in Philadelphia and Washington.

The Eastern Theatre  

The Western Theatre


Casualties

The Confederates lost 14 and the Union 19.


Friday, August 25, 2017

Battle of Ligny - Part One

I've been working on perfecting this cut down scenario of the Battle of Ligny for use with Napoleon's Battles.  It is based on work done by Rafael (see my earlier post here).

The Order of Battle is fine, the stream is pretty good (I based it heavily on the Rousseau map), hills/contours are a bugger, and the Built-Up-Areas tricky.  I ended up following SPI's Napoleon's Last Battles' Ligny map and set up quiet closely.

The terrain (except trees and roads) and figures are mine.  Richard took the Prussians.  Proving that no battle plan, eh, scenario, survives the first few minutes, Richard launched a major attack on the French right using the Prussian II Corps.  Not what I expected or intended the scenario to allow, but it made for a good game.

I designed an early start at 14:00 with the French III and IV Corps moving onto the battlefield.

The 7th Division advances on St Amand.

The 14th Division tackles Ligny, but it doesn't go well and the Prussians are massing...

The attack on St Amand meets with immediate success,
the Prussians had been disordered and were in no state to defend the village.
Note: St Amand consists of two Built-Up Area (BUA) segments.

The Prussians throwing all they have into an attack on the French right.
The French started to immediately withdraw.

Come 15:00 and Napoleon has arrived with the Guard.
(He can be seen in the next picture, lower right hand corner)

Milhaud's cavalry has been deployed to the left.
The Young Guard have been pushed forward to help in the attack on St Amand.
A Grand Battery has been formed between the III and IV Corps.

The cautious, but hopefully overwhelming attack on St Amand (centre).
The French have abandoned all thought of attacking the village of Ligny (top right).

The French right, just before the charge of the 7th Cavalry Division.

The French have completely taken St Amand  with an attack lead by Vandamme in person.

The French attack the Prussian advance.  
From here on the French IV Corps and the Prussian II Corps are heavily engaged.

That's the French 13th Division out there a bit exposed.

The Prussians counterattack.

They are repulsed.
Around this time the Prussians used the last of their Free Rolls.

In a stroke of good luck, part of D'Erlon's Corps arrives at 15:00.
This avoids panic in the French lines over just who the "dark masses" were.

The view from the Prussian side.

The Prussians still have a have lot of troops around Ligny.
They have been hampered from being able to freely deploy by the table edge and the brook itself .
I am sure Grouchy would have something to say about this.

The French are pushing ahead inexorably (they hope) west of the Ligny Brook.
To the east however they are possibly a little over extended.
The IV Corps is very depleted and the Old Guard are having to shore things up.

At least Napoleon still has a few Free Rolls left.


Wednesday, August 23, 2017

Napoleonic Leftovers

In between playing WBTS I actually found some time to complete some leftover figures.

A Dutch-Belgian command stand created from the figures I had left from the Old Glory Nassau pack.

Not a leftover, I finally got another Battle Honours British general completed.

Essex British foot artillery.  
Not really required as with Napoleon's Battles the British normally just have horse artillery present.

Essex British Peninsula artillery.
Again, rather surplus, but at least they are painted and based.