Thursday, December 19, 2013

Wings of the Albatross

For my fourth game of Wings of Glory, and my third at the NWS using Stephen's collection of planes and accessories including the very impressive playing mats, I was in charge of a pair of Albatross fighters.  Scarily one was without a pilot (first series plane).


Our mission was to stop the return of two bombers and their escorts.  We had six to their four, but those bombers with their rear gunners are murder to engage.


The bombers escaped, taking down one of our planes and leaving another in flames.  Both my fighters got shot up but managed to break off and head for home.

A very visually appealing game and easy and fun to play.  Our game had three players a side and handling two planes is just about the safe limit, especially in the new licensed premises the NWS now enjoy.

Wings of Glory added to Xmas wish list!

Wednesday, December 18, 2013

Burgundians versus English DBA style

It has been three years since my last DBA game with Kriegspielers back in Canberra and as I've signed up for the DBA competition at Cancon next year I needed to get in some practice.  Mark very graciously agreed to have a game and demonstrated I was very much in need of practice.

I had studied up on WADBAG's DBA 2.2+ only to find it is quiet an improvement, eh difference to DBA 2.2 that will be used in Cancon.  Pity.

The first game was fairly close, but the English triumphed after goading my knights to charge their archers.


And there was still time for another game - something that has to be admired about DBA, quick, fun, and colourful with plenty of decisions.


In the next game my bombard knocked back the English and then my general took off, pushing them back, and back and back.  I was up about three elements and then it all went pear shaped.  We were each down three elements and had our generals in the thick of things, outflanked and everything so it was very close.  Sadly my general must have been exhausted as he just couldn't make it.

Great games and I am now really looking forward to the competition in January next year.

Monday, December 9, 2013

5mm Samples

Can an old dog relearn his tricks?

Mark provided me with these 5mm strips and a few hours later I produced the following.  Most time went on researching uniforms and deciding what paints to use.

The ACW came up best and for my purposes are what I am looking for - they look great enmass on big bases.  The knights and hoplites in my opinion really deserve larger figures so the livery and shield designs can be fully revealed.


I can't recall which brand the ACW strip is (the others are Heroics and Ros), but they have character even if their hats are a bit big.  The magnification provided by the digital photos is a bit scary.

Paper Terrain - European Village Number 2 - Part 2

Three buildings completed now.  I brought in some extra tools.  The spring tweezers are good for hold the dormers while they dry, chimney stacks too.  The contraption is for holding the dormers in place while they glue.  The card is for protecting the cutting mat while I run the felt pen over the underneath of the roof edges.


Oh dear, wobbly chimneys on the large townhouse.  I've done some edge work on these buildings, but haven't totally completed, still looking for a colour that matches the chimneys.

The little out-house is a cute touch.  I put some extra scenic material around to give a bit of a finished look to the buildings.  The tiled mat they are sitting on was cut from an advertising flyer that had conveniently arrived in the mail.

Three down, nine to go.  Best yet, my daughter has picked out two that she said she'd make.


Saturday, December 7, 2013

Burgundian Ordonnance versus 100 Years War English

Yesterday my Burgundian Ordannce army, all 600 points of it, finally got to take the field in what I am pretty sure was its first battle. I started building the army back in the late 1980s using Tin Soldier figures, basing it for WRG 7th Edition, the aim being to have an army very different to my Hellenistic troops.
My army from the right.

My army from the left.  It had already claimed the vineyard for Burgundy.

The opposition - Mark's superbly painted 100 Years War English. Hiss!  Boo!

After a bit of a slow start - Charles the Indecisive here, and the English were mostly on foot - action commenced on the right with my Mounted Crossbowmen (who couldn't hit a thing) facing off some Irish scum backed up by superior Gascon knights.  The knights charged, bursting through the Irish and my troops evaded.

On my left, after a rather rapid advance with the handgunners and longbowmen, I decided to switch the Men-at-Arms over to the centre.  If only my artillery would get out of the way!

A mighty tussle ensued on the right as knight took on knight.  The mounted crossbowmen came back and with the help of the foot crossbowmen who could shoot, spooked the Irish and set off for the enemy camp.

After holding the Gascons to two draws my Men-at-Arms lost a second base (combats were bloody with four or five hits per round) and broke.  But help was at hand and the enemy general had been killed.  The Gascons fought bravely but were done for!

On the left, not so good.  Even though drilled, my troops just couldn't maneuver quick enough to get out of the way and ultimately paid the price.

My knights, while attempting to redeploy got hit in the rear and quickly collapsed.  All that was left of that flank was the artillery.  I was pretty happy to get it into action, but it performed poorly and was really too much trouble to have in the army.

But the game was very close.  My remaining knights were doing really well against the dismounted English and it was a close run thing to see who would break first - them or my artillery.  It was that close, but it was not to be.  Artillery lost a base and kaput!

I could still go another turn if, on what was their third attempt, these buggers would rally, but they had had enough.  He who runs away gets to drink another day.  They had stripped the vines bare and were claiming victory.

A very exciting game using Field of Glory 2.0.  I still have a lot to learn.  The rules worked well although we did have some funny burst through situations, one of which resolved itself very much in my favour by positioning my troops back were I wanted them after trying to get them to contract three times and failing the test each time.

Thursday, December 5, 2013

Paper Terrain - European Village Number 2 - Part 1

No, not an obscure reference to Patrick McGoohan's The Prisoner from 1967, but a kit of twelve buildings passed to me by Richard as something he didn't see himself ever completing, but just might satisfy the current crazy desire I have to do some paper modelling.  The paper boat will have to wait.

Basic tools.

The kit.  Before 3D there was ... 2D!

Very basic house, perhaps it did take five minutes as per the instructions.


Chimneys added with the roof edges coloured using black felt pen.

And what makes these models fun - lift them off and you have a ruin.


Modelling Coastal Fortifications - Old Airfix Magazine Article

This is a bit of a precursor to some paper modelling I am doing at the moment that will feature in future posts.

My painting and modelling is reduced at the moment as I am currently tidying up my studio after some building work was completed (think dust everywhere on stuff that hasn't been touched for three years since we moved in and just dumped everything in what was advertised as "the games room"  - it is more a potential granny flat that has been treated as a shed and often referred to as the "man cave").  In tidying up I found a paper building I had made back in the 1970s.


I have no idea why I did this.  It was a one off and apart from dreaming, I had no plans to do anything else from the Operation Sealion set of articles that appeared in Airfix magazine between 1975 to 1976.  I had built a few paper houses around this time from kits meant for railway layouts and must have been interested in seeing what I could scratch build I guess.

It has stood up to the test of time fairly well although it has never been used in "anger" a bit like the fortifications it represents.  The only failing was the sticky tape used to secure the windows to the walls.  I might have to see if I can redo it using PVA glue.  The "hinge" is not perfect, not sure how I can improve on that easily.

I am pretty sure I no longer have the Airfix magazine as they would have been something I would have given up as part of the big move - that said, anything can be lurking in the studio at the moment.

I did a search of the Internet and found items about the series, but not the article I was after. Then, in a bit of serendipity I came across a scan of a single magazine issue which just happened to have the article: http://www.scribd.com/doc/171814120/Airfix-Magazine-February-1976

Here are the relevant pages, poor quality, but the inspiration is still there.


Funny thing is these emplacements, from rereading the article, were mock ups using wood and canvas, so paper is perfect for making a model of them.


Square Combat

This is a little reenactment of an odd combat situation that reoccurred in the last Napoleon's Battles game.  I say reoccurred as it in a game back in June 2011.  I had posted to the Yahoo Group for advice and got a good response, but not a memorable response.  Both Richard and I had forgotten it.

On with the reenactment.

In the Prussian Maneuver Phase they advance their horse artillery into range of the French column and put their cavalry on react, the commander moving so he can keep both units in command.

The Prussian horse artillery kept out of the fire range of the French column, but failed to see the supporting French heavy battery.  The French fire first and double the dice roll of the Prussians and thereby put one hit and disorder the Prussian battery (the +2 fire modifier for French artillery can be deadly).  The disorder means the Prussian battery can't fire so that is the end of the Fire Phase.

In the French Maneuver Phase they send in their column to close assault the Prussian battery.  The French battery is careful to make sure it is not blocked by their infantry so it still has a target - if it gets another hit that is the end of the Prussian battery.  The French have committed their commander to the fight, troops in column need all the modifiers they can get in close combat.  As the Prussian battery is disordered it cannot evade.

The Prussian cavalry react and attach themselves to the battery in order to protect it.  The French column forms emergency square.  Using the second edition rules 6.2.5.1.1 states "no formation change may be made if touching or within one inch of an unrouted and undisordered enemy combat unit (EXCEPTION: see 6.4.4)"  The exception is of course emergency squares.  It states that an attempt to form "square formation :must be made unless such an infantry unit is already touching or within one inch of an unrouted enemy infantry unit."  The change in the rules to limiting pinning units to only infantry was one of the major changes between the first and second editions.

The combat is marked.  The cavalry will be the modifying unit on the Prussian side.  However there is fire combat first.  Prussians fire first, but their battery is disordered and so it is over to the French.  The enemy battery does not block the French artillery fire which scores a double hit on the Prussian cavalry.  Ouch!  That disorders them, but they were already facing a losing combat against a square so it won't really effect that combat outcome.  The French square gets to to fire, unlike the artillery which has a plus two fire modifier, it has a minus one (would have been minus two if they had not formed square).  The dice are rolled and it beats the Prussian score by one, inflicting one more casualty.  This takes the cumulative casualties in the Fire phase to three which is the Prussian cavalry's rout number ... 

The Prussian cavalry rout leaving the battery to fight on alone.  The expected outcome was that the cavalry would have bounced out, taking one causality but only being disordered, not routed. The attached artillery unit would have remained attached and bounced out as well (6.6.2.1.3 does not place any limitations if the attached unit is already disordered).  If the cavalry had been routed by combat the artillery unit would also have routed, but the rout was caused by fire.

The resulting combat was square versus battery.  In our game this was where our confusion arose - what factor does the square use?  The rules say to "use the current formation modifier".  We settled on "versus other", which gave a minus four modifier.  It got plus three for mass and plus one for the general.  The battery was at minus three for unlimbered and minus three for disordered.  A roll of four or higher by the French would eliminate the battery.  The Prussians would need an eight or better and the French rolling a one, two or a three too survive, noting that a tie would also eliminate the battery.

The Prussian cavalry could have tried to contact the French in such away as to keep clear of the French battery and the risk of getting serious damage.

Maybe units that are in contact should not be able to form emergency square.  It comes down to the interpretation of "or"  in 6.4.4.  From previous discussion on the Yahoo Group in June 2011 I didn't draw a consensus on the issue, but my feeling now is that being in contact with any type of enemy unit stops the unit form forming emergency square.  

Contact only occurs in one of two ways:
  • Either the unit goes into contact and will therefore be too busy doing its thing to have a chance of forming square (noting that any contact with a routed unit is a moving combat and doesn't trigger react; or
  • The unit has been contacted by the enemy and has therefore already had its chance to form emergency square if applicable.  Batteries, routed units, disordered units and wagons cannot initiate contact.


I am glad I have got that off my chest.


Tuesday, December 3, 2013

Pousard Leipzig Project – Part 6

A further installment from Lawrence with the covering post from the Yahoo Group - The Unofficial Napoleon's Battles Group:

"Ok the battle finally began, I really underestimated the time it would take to play. After going over the rules and demonstrating how a turn would go (with the little card board pieces and watching a youtube vid) with my other opponents and well technical difficulties associated with the family, we finally started Friday and began again Saturday. We were only able to get to the 12:30 turn when we stopped and will begin again next weekend with the aim of finishing the day of the 16th. I am by no means an expert on the rules, but I didn't think I had forgotten as much as I did for not playing them for a few years( I guess playing Xbox too much really can destroy brain cells...LOL). I posted some photos of the battle in my album on the yahoo group.
 
Best Regards
 
Lawrence"

Dec 2 5:17 AM

Reproduced below are the photos and accompanying titles from the Yahoo album.  Any additional comments are mine.

Austrian III Corps slowly moving into position.

Bertrand moving to support Lindenau.

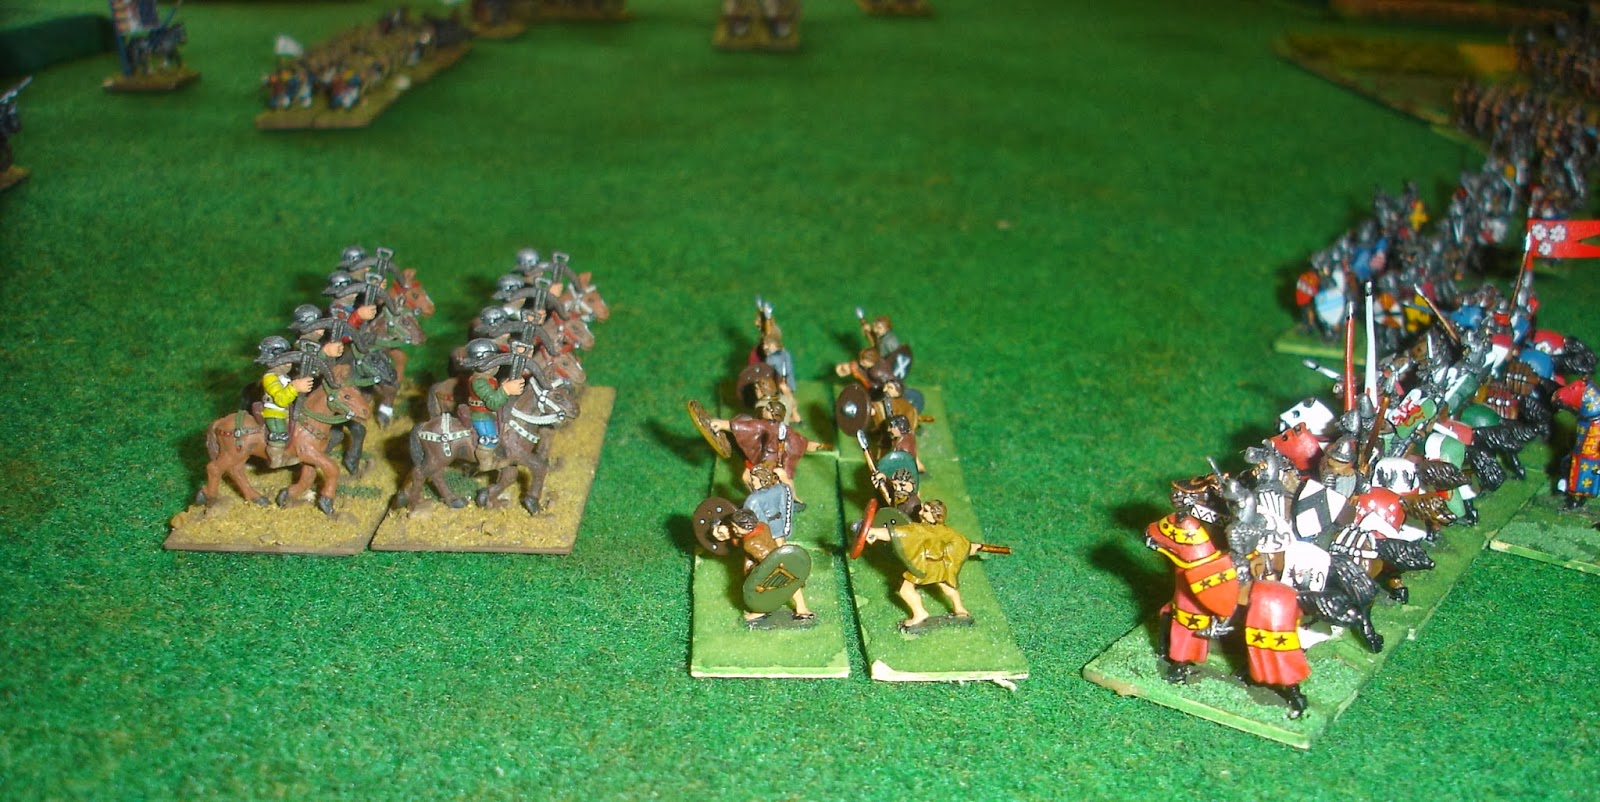
Charge and counter-charge.

For any viewers not familiar with 1st Edition Napoleon's Battles, the yellow counters are react markers used to denote that a cavalry unit may move in response to enemy movement; blue counters are disorder markers, disorder generally caused by enemy fire with the result that disordered units can't fire, move at half speed and have a minus three combat modifiers; green counters denote limbered artillery (not to be confused with march column); and the grey counters are to show casualties. 

French brigades pinned in square by allied cavalry attacks.

French counter charging action at Liebertwolkwitz.

French forces moving forward.

French guard troops re-positioning forward.

French V and CC moving forward

More cavalry charges being counter charged

Poles blasted out of Markleeberg.

The pink counter denotes a routed unit.  Certainly in games I have played the way to clear towns is to use  fire rather than close combat.  It takes time, but the dice will eventually be with you.

Prussian advance stalled.

Situation 11:30 at Connewitz.

Situation at 12:00 with Russian GN followed by the Allied staff.

Situation 12:30 looking from NE to W.

Situation 12:30 looking from north to south.

Situation 12:30 looking from SE to NW.

Situation approximately 11:30 vicinity of Mockern.

Situation at 9:30 - 10:00 after a few earlier allied cavalry attacks.

Excellent work Lawrence!

Massive game and I like how you can seen the action unfolding in the photos.  Lawrence has applied his troop labels in the vertical fashion and they look less intrusive than the style I use.  The counters help tell the narrative as well.

I am looking forward to seeing how this game continues.  So far I have only completed table B, A and D with the big one on Table C still to do.  Here are the links to the three games for comparison purposes:


Just to restate this is not my game, figures or pictures.  The aim of this post is to give wider access to people interested in the subject of refighting Napoleonic battles using miniatures, particularly 1/72nd scale plastic figures.