Sunday, April 28, 2019

The Siege

On Saturday at the Club's games day I was fortunate enough to take command of the besieged fortress.  I had control of some ten battalions and five big guns, but not much ammo.  I had to hold out for twelve weeks as winter was coming which would put an end to the besiegers' activities.

Fort and entrenchments plus defenders are from Simon who developed the rules and umpired.  The besiegers, Martin and Steven, supplied their own troops.  I provided the explosion markers.

The rules were based on the SPI boardgame about the siege of Lille.

The following photos were taken with my phone which I am slowly getting the hang of.

  The Allies in position to start encroaching on the fortress.

 The brave defenders.

 End of the first week.
I managed to delay the work on one sap, 
but must start rationing my ammunition.

 End of week two - the saps are getting bigger.

 Week three and the parallels commence.

 One of the fortress' bastions and the ravelin have taken a bit of damage.

 End of week four and the besiegers are now in a position to bring some of their guns forward.

 My infantry safe behind the fortress walls.

 Week five and things are looking serious.

 We are now within mortar range, not that there is much ammo.
As it was it was silenced on its debut 
(which explains why it is facing the wrong way)

 Week six - we can't quite see the whites of their eyes yet...

 The enemy mortar.
Neither mortar seemed much good at getting hits.
In fact much of my defensive strategy relied on the enemy missing.

 Week seven.

 Week eight.

 The attackers manning the entrenchments.

 The defenders behind the walls.

 Week nine.

 Week ten.
It is now or never.  
We mass our fire against the enemy building their forward saps.

 This one is blown away.

 And the other one as well.

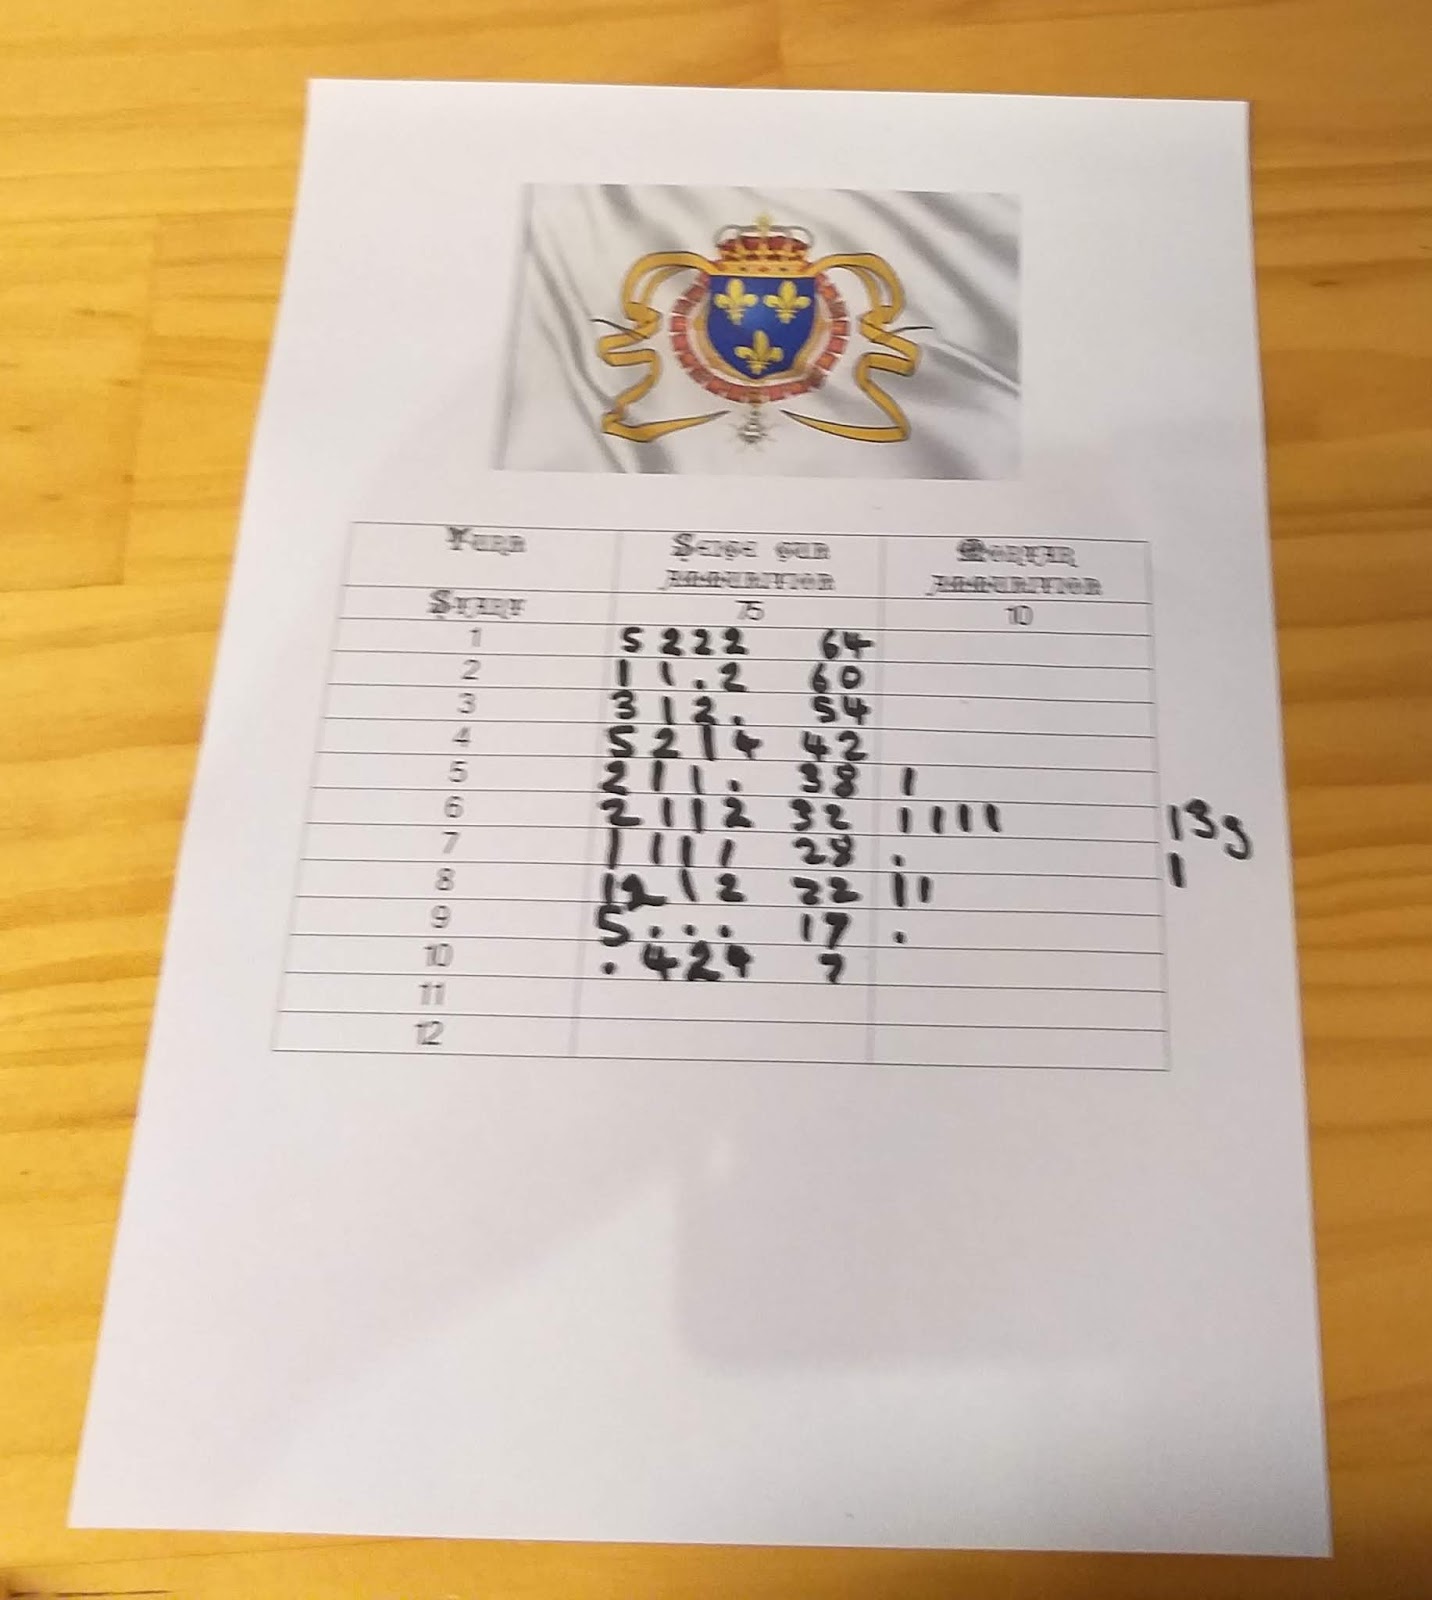
I am down to seven rounds of ammo for my siege guns and three rounds for my mortar.

 Week eleven and all my troops are to the forward defences.
An attack is imminent.

 But it never came...
My guns were down to their last round, but the enemy's artillery was exhausted.

 This is as close as they got.

The fortress survives.

Friday, April 19, 2019

Ardennes'44 - Rest of Day 6 and Day 7

Well I thought it was all over for the Allies, but the game goes on.

Richard and I picked up the game at the afternoon of December 22nd.  I was certain the Germans were going to capture six victory locations on the west map.  They already had four and at least two, or as it turned out five or more were within striking range.

 Patton's attack against the 7th Army in the south east.

 The Germans capture a fifth victory location, St Hubert (bottom right).
However Rochefort held out (in the middle).

 US troops start to arrive from the north,
as the Germans start to probe key locations on the Meuse.

December 23rd


 The US attacks continue against the 7th Army,
but the Germans are sending reinforcements there, but maybe not fuel.

 US airpower stops a German attack on Rochefort.
However they are unable to retake St Hubert.

 The US make a major series of attacks in the north.

 US attacks against the 7th Army continue in the afternoon.

 Again US fighter bombers stop the German attacks on Rochefort,
however again the US fail to retake St Hubert.

The US attacks is the north are finally showing some progress.

And there the game hangs in the balance. 


Can the Germans secure a final victory location?  


Can the US exploit their success against the northern flank of the bulge?

Wednesday, April 17, 2019

Some gear for my WW2 forces

 Three Zvedza PzIVs in flash.

 Apart from the poor focus on the front tank,
the paint colour comes out better without the flash.
These were a gift from Mark Woods, I just added the paint.
I was going to give them some transfers...

 Something I actually paid for myself.
A T19 105mm HMC.

 The transfer on the bonnet was a bugger
and the reason I didn't go with transfers on the PzIVs.

 A pair of T28E1/M15 CGMC antiaircraft half track things.
A cruel gift from Simon - these were a bugger to assemble,
and there is that bonnet transfer nastiness as well.

At least they are done now and they look good, even if I say so myself.

Tuesday, April 16, 2019

A bit of extra stuff for my ACW collection

These were a gift from Simon that I've assembled and repaired as required.

From this side, much as Simon gave them to me.

 My attempt to create this side of the flag 
and the nearside horseman has been repainted in a more Confederate style.

I painted up all the Old Glory artillery crew I had a long while ago
 and consequently have always been short of guns. 
These will do nicely.

Monday, April 15, 2019

Ardennes'44 via Vassal Day Nine, Ten and Eleven

The last three days in the standard campaign game.

Morning December 24th

 2nd SS Pz Corps and 5th Pz Army attacks.

 6th Pz Army attacks.

 7th Army attacks

 Pz Lehr attacks.

 US attacks from the north.

US attacks from the south.

The big picture at midday.

Afternoon December 24th

 6th Panzer Army attacks

 North of Bastogne.

Panzer Lehr low on fuel.

Midnight

Morning December 25th

 Desperate attacks by the 6th Pz Army.

 Southern side of the bulge paralysed by fuel shortages.

 US attacks on the northern flank.

US attacks on the southern flank.

The situation at midday.

Afternoon December 25th

6th Panzer Army keeps attacking.

 But on the south things have bogged down,
not helped by extensive fuel shortages.

 7th Army making an attack in the south east.
The attack was not successful, but the US later withdrew these forces to use in an attack further west.

 US attacks from the south.

US attacks from the north.

Midnight.

Morning December 26th

Final attacks by 6th Pz Army.

5th Pz Army on the southern flank has started to pull back.

The US keep attacking from the north.

And from the south.

By midday the US attacks had made progress.

Afternoon December 26th


The last attack from 6th Pz Army against Stavelot comes close to capturing it, but again fails.

The US keep attacking towards Manhay

While on the south flank the US make a determined push.

The whole map at the end of the game.

 Detail of the northern sector.

German progress here was held up as the US had used strategic movement to push reinforcements into blocking positions that then tied down German troops to liquidate them.  Stavelot is still, just, holding out. This was something I had failed to do in my game with Richard.

Detail of the southern sector

The Germans had benefited from deploying the 2nd SS Pz Corps to this flank, but fuel shortages and blocking points by US paratroops in woods stopped them from exploiting their success.

Excellent game, the complexity is in the counters and map.  It worked really well on Vassal, but took about an hour a turn.