Thursday, May 8, 2014

SPAD

I know very little about the Spad aircraft, but I took my model to battle last night at the NWS, escorting a Caproni CA.3 that was intercepted by a white Fokker D.VII and a brilliantly coloured Halberstadt CL.II.  I flew the Spad and the bomber and Stephen the Fokker and Mark B the Halberstadt.

There's me Spad, blending in well with the terrain.

The Hun.

The Spad flying escort for the Caproni over a town somewhere in France.

Here they come!
The Halberstadt got in a good shot on the bomber (downing it is the German objective), but took fire from both the Caproni and the Spad.  Both the Halberstadt and the Caproni started smoking.

The Halberstadt gets a tail gunner shot in on the bomber, but again takes double fire, and it was close range this time.

The Spad and the Fokker narrowly miss colliding as the Spad gets a final shot into the Halberstadt that sees it explode.  The Fokker gets caught in the fireball, but the Spad continues its circling of the bomber unscathed.

The aftermath of the first encounter.

Can the Fokker make it back?  We calculated it had a 30% speed advantage on the Caproni, but would that be enough to catch the bomber before it left the contested airspace?

A bit more maths determined that the Fokker wasn't going to catch up before the Caproni exited.  Worse the bar was closed and my glass was empty.

I had been trying for this "shot" most of the night.

Our solution to the edge of the world problem was to swap the mats over (we were using two and were able to move them without any trouble).

The Fokker got closer and closer while the Spad did its best to hang back and try and get on its tail.

Bye bye Fokker!
The combination of the Spad and the Caproni's rear gun was just too much.    

Moving the mats to prolong play certainly gave a better and more realistic game. We had swapped them at least twice if not three times (the excitement preclude accurate record keeping at this stage)..

We had made a few mistakes in initially thinking the Caproni had two rear guns and also in a certain white plane forgetting to weave about when it was on fire.

For the record the Caproni had taken 60% damage.  The Spad was unscathed.

Monday, May 5, 2014

Somewhere in Normandy with Blitzkrieg Commander

Not sure blitzkrieg is the right term at this stage of the war, but Blizkrieg Commander were the rules we used to have a successful game on Sunday of US versus Germans.  Richard organised the game and provided the German forces from his collection and nearly all of the terrain (I provided some boccage and a few entrenchment markers).  Mark W provide the US forces and took command of the paratroops holding the village.  I took the command of the US relieving force.

Signature shot. The wooded hills separated the two battlefields.

The Germans were concealed and it was always going to be hard for the US recce force in the Greyhound to survive first contact.  The Pak 40 took it out.  In the background can be seen the Pak 43/41 monster.  The German AT guns were in gun pits, their infantry just in the softcover provided by the woods.

A closer view of the Germans spotted by the US.

The US Shermans approach while the infantry lag behind.

The remaining US forces in my command come under fire from the Pak 43/41.

The Shermans.

The Infantry.

The WTF!  
A command blunder on the second turn saw the US Infantry take half a move back with the result that over half of them exited the table and thereby considered "out of action".  Oh well, I guess higher command had a better use for them.  The paratroops later had a command blunder that saw them vacate their defenses and mull about in the village square.  Not to be out done the Germans also had a command blunder that saw them go backwards into an airstrike.

The FAO.  
I'm not sure if he is looking for the missing US infantry or bird watching, but whatever he was doing he called in some devastating artillery barrages that destroyed the Pak 40 and the Pak 43/41 along with the German mortars and a lot of their infantry.

The guns.

The village.
Spot the dice and plastic bag of explosions.

My command faced a third German AT gun.  It proved very hard to destroy.

The few infantry who stayed with my command move up to protect the tanks which have come under determined panzerfaust attack.  When we tallied up the US units remaining we were well over our breakpoint.  However we hadn't been keeping a close watch and when we checked the Germans I was facing they were also spent.

The paratroops fought on and hopefully will feature in a post by Mark W.  If they do I will add the link to that post here.

We were strangely rusty with the rules and had to look a number of things up.  Not a big ask with the rules only being about 30 pages or so (once you takeout TOE information and examples).  

As we found with our previous games, infantry in entrenchments are hard work to neutralize.

It was a fabulous looking game with some great miniatures and played through in about five hours.

Friday, May 2, 2014

Leipzig Table C Scenario - Napoleon's Battles

This is the big one. Set up had taken around two hours.  How much of the game would we get through?

The scenario had the battle starting at 06:30 with the first Allied reinforcements arriving at 12:30.  Could I hold out that long?

The road to Wachau.  
The French launch a spoiling attack against the preponderance of Russian artillery.  Barclay is in the way of the cossacks who might (40% chance) have gone to the battery's aid.

While the Allies moved first, it meant that the French got in the first fire and a few of the Allied guns were damaged.  The return fire was pretty poor except against the exposed troops in the French II Corps.

Markleberg.
Another spoiling attack by the French, eh, Poles, but this time they were met by the Prussian heavy cavalry and did not fare well.

With Victor's Corps blown away the French launch a cavalry attack to pin down the Prussians.

All my new innovations are on display in the above picture:
  • the unit labels as flags with coordinated pin heads;
  • movement trays (a bit awkward when my troops had to form square); and 
  • combat markers (some kind of expanded polystyrene packing foam).

The Prussians also ended up being fairly fixed to this position with their front on the Markleeberg-Wachau road more or less (the less being they failed to ever capture either of those two villages).


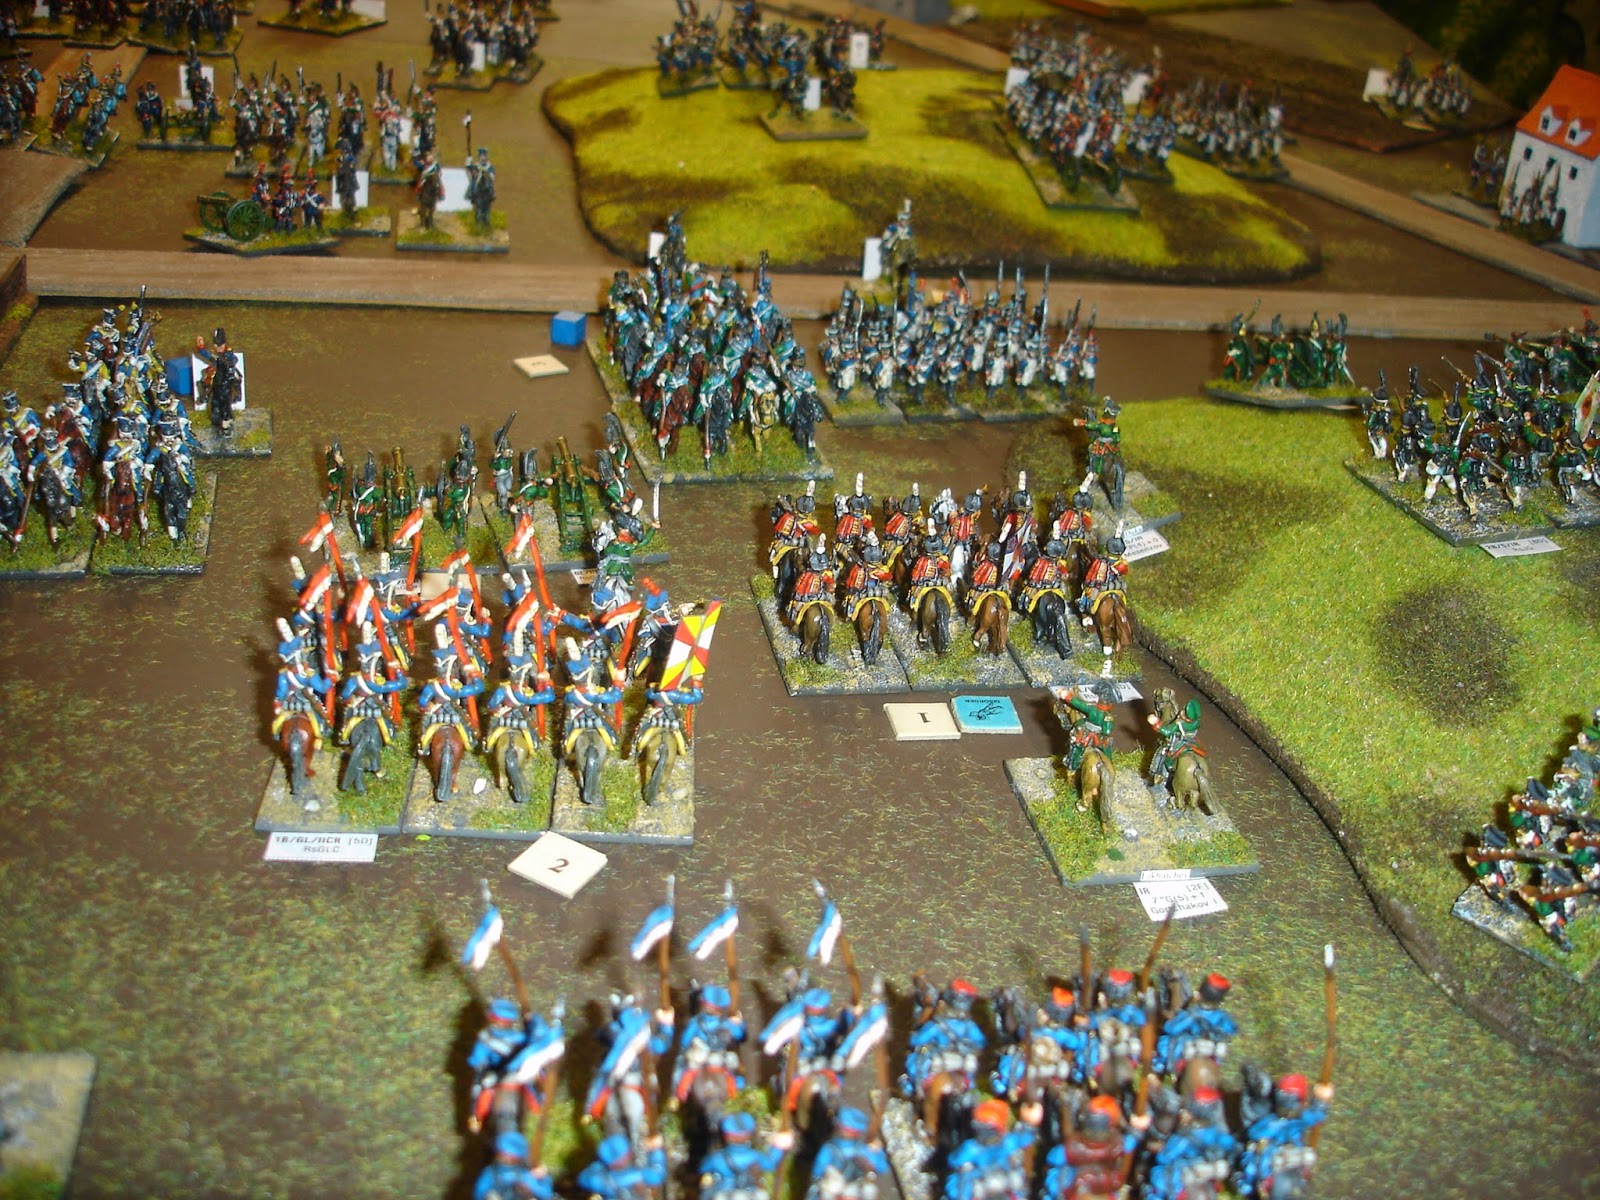
Another attack by the French on the road to Wachau.  This time the cossacks charged.  They failed to do any serious damage to the French who didn't even form square (pinned by the proximity of the Russian infantry).  The Guard Lancers on their right had more success.

A Polish brigade holding to Markeelberg.  They were being worn down, but stood firm for the length of the game.

The closest the Russian got to Galgenberg Hill.

However, even at this early stage, weight of French numbers was beginning to tell and they were able to mount a counterattack which pushed the Russians back.
 
The Russian Guard Hussars.  
After going to the rescue of some batteries they then did the unforgivable and continued on in an uncontrolled charged, disordering the batteries they were supposed to be protecting and getting themselves beat up for no good.  The batteries were moped up by the French in the next half hour while the blown hussars looked on in disgrace.  None of the cossacks helped either (about five goes with a 40% chance) although they probably wouldn't have done much, they might have saved the guns. 

Still fighting along the road to Wachau.  The Russians fail to form square and the cossacks fail to come to their aid (where is the Guard Cavalry when you need it?)

The Allied centre has collapsed.  Guldengossa is held by the remains of the Guard light cavalry, but everything else is routed and/or fatigued.  Being right on the table edge there is not much that can be done, not that I could do much, but I would have routed these units much further away.

This is around the 09:00 turn.

The Russians are now on the defensive.  Their I Corps is clinging  to the hill.

Wittgenstein looks on as the French start to sweep round the left flank of I Corps.

A Russian artillery officer looks for his lost gun, last seen on the road to Wachau.  The guns had been lost and reclaimed and lost again.  But now the Russians were reduced to just "looks that would kill".

The beginning of the end.  Having broken the centre the French I Corps heavy cavalry now started to attack the right of the Russian II Corps.

After repulsing numerous frontal attacks the Russian I Corps is being taken in the flank.  Barclay and Gortchakov are leading the brigades in person.

The surrounded Prussian II Corps.  

We finished around the 10:00 turn.  We had played for about eight hours and it was pretty exhausting.  The Allies were done for and their reinforcements were not due till 12:30.

Commentary

The rules worked well.  We were a bit rusty and had to look up a few things, but no real surprise there.  The optional rules we used were Napoleon, Alexander, cossacks, massed artillery and wheeling template.  It wouldn't have been Leipzig without the Napoleon rule.  The Alexander rule had no impact as the Allies were so crowded together with plenty of Wing and Corps commanders.  Cossacks... grumble (I ended up getting them involved by either putting them in the way of the advancing French or attaching them to batteries).  Massed artillery... probably okay (otherwise it would have been a very long line of batteries and very hard to command).

I don't care for the compulsory withdraw rule.  I think it would be better if this was left to the discretion of the player.  My objection is that it seems to inflict double the casualties on the Russians.  They can take 4 losses in combat and then easily another 4 or 5 in withdraw and as a result just about dispersed.  Much better for them to keep on fighting, take a maximum of one more loss and then rout.

There are two or three major failings with this scenario.
  • The start time is wrong.  According to Petre mist and smoke covered the filed delaying the start till 09:00.  If we had started at that time the allied reinforcements would have been arriving when the allies were most threatened, just like in the real battle. 
  • The table area is nine foot by five and we were playing in just three foot by five with the allies hard up against the table edge.  As the whole battle was fought in the vicinity of Wachau, the table should have been centred on that village, which would have given the allies and extra three feet of rear area in which to regroup and marshal their reinforcements.
  • There is no incentive for the French to hold back forces to deal with developments on their flanks.

That last point really reflects the fact that  the scenario is just a break down of the overall Leipzig battle scenario, rather than a well thought out battle/game in its own right.  For the standard nine by five playing area common for Napoleon's Battles, a much better orientation could have been achieved covering the southern battle.  I am keen to redo the battle (in a few years), but with a redesigned scenario representing the full southern flank.

It would be nice to be able to leave the game set up so it can be played over weeks as it is unlikely that sufficient time can be scheduled to knock it off in two or three days (plus it is exhausting).  More players might help, but then complicates scheduling.  It would be easy to have two or three players per side.

The majority of the figures and the terrain was from Richard's collection.  The Prussians were mine and some of the Russians as well ( the infantry of the II Corps).

With regard to my innovations.  The troop labels and movement trays didn't get much use.  The combat markers I found very handy as it is easy to overlook combats.  They also added to the visual appeal.


Thursday, May 1, 2014

Albatri and Flaming Camels

Took my Albatross to the NWS last night for a five player/five plane game of Wings of Glory.  Three Albatross being set upon by two Camels.  Steve's Camel caught fire early on, but that didn't stop him from damaging my plane before his timely demise.  At 11 damage points out of 15 I ran for home and let the others battle it out.  Great game for a club night.

I attempted to stall and let the Camel pass me, but he thought the same and I ended up in his sights.  Grrr.

Finally I get some shots in, but that flaming Camel still has a bead on me.  Grrr! 

That's it!  I've had enough, I'm taking what is left of my shot up crate home.

Wednesday, April 30, 2014

Leipzig Table C Setup - Napoleon's Battles

While pursuing the Allied Army of Bohemia, on 16 October 1813 Napoleon finds himself at the centre of a concentration of Allied armies.  

Napoleon's Battles provides a scenario for this battle spread over four tables.

Table C is the fight against the Allied Army of Bohemia. This is the big one we have been aiming to recreate and for which we did the setup today.

Table D is the fight against the Right Wing of the Allied Army of Bohemia (Kolmberg Hill?).  See AAR from August 2012.

Table A is the fight against the Allied Army of Silesia (Mockern). See AAR from December 2011.


Table B is the fight against the Left Wing of the Allied Army of Bohemia (Lindenau) .  See AAR from October 2011.

Signature shot.  
The scenarios are from the fabled red book.  In the picture are the villages of Probsthayda and Meusdorf with the French First, Fifth and Fourth Cavalry Corps.  The Galgenberg Hill is at the top right hand corner.

The left flank of the Allies resting on the River Pleisse.  There are a few too many Poles (VIII Corps) facing the Prussian II Corps, one brigade and the Corps' artillery is actually not present in this scenario.

The Allied right with the Russian I Corps facing the French V Corps.  In the centre is the Russian Guard light cavalry division backed by many, many Cossacks.

Russian II Corps featuring my recently acquired musketeers making up its two much reduced divisions.

My Prussians.

I am trying out an alternative way of using labels based on dedicated stands.  They are still in the prototype stage at present and this game will be the first trial of them.

The depth of field.  
The table is 9 x 5 foot and all the action takes place at one end.  The Russians are nearly all artillery.  The village of Guldengossa is in the immediate foreground.

Russian Guard cavalry (figures are mainly Old Glory with some ABs, War Modelling and Essex miniatures).

Napoleon coming down the road.

Another shot of Napoleon, perhaps thinking he better attack quick...